Thứ Bảy, 24 tháng 11, 2018

Youtube daily how Nov 24 2018

hi I'm Sophie and welcome to my world and today I'm going to continue my three

part series in making rolled beeswax candles for the holidays today we're

gonna be making what I call a skinny candle with stripes I'm gonna teach you

how to make it right now for this project you'll need beeswax candle

sheets in two colors candle wick scissors hairdryer ruler an exacto knife

I'm going to take our sheets and we'll have cut them into half and as I

explained in my first of this series I've been doing a lot of crafting with

kids and so I've already got these cut now here's the thing about this we're

making a skinny candle and so we actually only need half of this sheet so

we can just measure it should be 16 inches long which it is a little bit

longer than 16 so we're gonna just measure 8 inches and put a little cut

with our exacto knife right here and then I'm just going to use my ruler

so I get a nice straight cut and that gives me two pieces now what's great about

this is that you can end up getting four candles from one beeswax sheet if you

decide to make the skinnies I'm gonna be needing some candle wick and the way I

do this is just like I did in our first of the series just take your wick hold

it at the very bottom measure about an inch over the size of the candle and cut

I'm gonna be using my hairdryer just to warm this end up very very slightly

not very much just enough so that my wick will stick in there and then I'm

gonna start rolling this up and over so I'm going to roll this up and over the

wick and I want to make sure it's nice and tight this is super super important

is make sure that's tight now I'm going to warm up the whole piece of beeswax

very quickly no more than like three seconds here we go one two so all you

need you're just warming it up to make sure that it rolls nicely if your

beeswax gets cold it will crack and that's why having the hairdryer is very

helpful okay I'm rolling this and what I'm doing is I'm making sure that this

end stays lined up I want to make sure that I'm rolling straight and not on an

angle and they're just gonna keep rolling and I'm rolling and keeping it

very tight I'm really important to keep it nice and tight now once we get to the

end as you can see that wants to flap off of there so what I'm gonna do is

take my hairdryer again really quick

and just warm it up enough so that I can use my fingers to seal at that seam

there we go now we've got the perfect candle that

will go right in here now as you can see this is a little teeny tiny bit too big

so all I have to do is push with my fingers to mold it into a little bit of

a taper and then it should fit there we go nicely now I want to add a little

bit of design to this and so what I want to do is I'm going to be using these

extra sheets this isn't yellow now the base box comes in all different colors

and some of the some of the kits you can get come with a color you know a sheet

of each color or you can get if you're doing lots of projects like I am you can

get it in just one color so this what I'm doing is I'm just measuring about a

quarter of an inch here and I'm using my exacto knife and cutting strips and you

can use the honeycomb the little little combs and basically I'm

doing two as you can see they're just two you can use those as your measuring

device you don't have to really get out a ruler and measure down a quarter inch

you just say two little combs now we do want to warm these up just to make sure

they stick nice again you see I'm not doing long periods of time when I do

that hairdryer doing it very quickly just short little bursts okay wrap it

around when you get to the end just give it a little cut and push with your

fingers the warmth from your fingers will also make it stick but the

hairdryer is nice because it just makes it nice and even in a warm

each time you put on a new piece you just want to make sure you warm it up a

little tiny bit

there you go I've got four little stripes there and as you can see I've

tapered that just a little bit so that'll fit right in there nicely I have

my candle and that's all there is to making your very own skinny striped

candles now remember you can buy this product on Amazon and we'll have a link

for it down below for more great ideas to do with this beeswax check us out at

sophie- world.com and if you like this series make sure to give us a

thumbs up and if you've got any comments about the candles themselves put them

down below we love to see your comments for more great ideas check us out

sophie-world.com

For more infomation >> How to Make a Rolled Beeswax "Skinny" Candle | Sophie's World - Duration: 7:12.

-------------------------------------------

DIY tutorial on how to make this drop down beaded necklace - Duration: 9:49.

DIY tutorial on how to make this drop down beaded necklace

For more infomation >> DIY tutorial on how to make this drop down beaded necklace - Duration: 9:49.

-------------------------------------------

How to Knit | Basic Cup Cozy - Duration: 21:57.

- [Kristen] It's back to basics with this knit cup cozy

today on GoodKnit Kisses. (classy piano music)

Welcome to GoodKnit Kisses.

We're all about helping you

stitch your love and love your stitches.

Nothin' wrong with goin' back to the basics

from time to time.

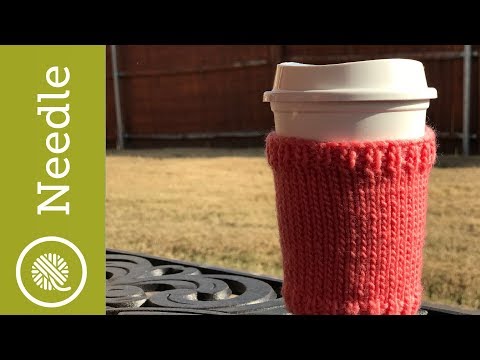
This basic cup cozy is a one piece cozy

that slides on with ease.

It's a tapered design, meaning it has no buttons

to fiddle with while you're trying not to spill your drink!

You can have your coffee, tea, or hot chocolate

and keep your hand nice and cool.

But basic and plain are not the same thing.

Being simple has its advantages,

because you can have a nice, big, bold color.

Or you can use stripes

on this nice stockinette flat stitch here.

Keeps it nice on your hand, not too many bumps on it.

Or you can spice it up with a duplicate stitch

and embroidery skills, put a monogram on here

or a nice, cool, fun design.

We've got some designs down below.

So if you'll click on that link,

you can go to the resource page

for some charts to inspire you.

We're going to go through all the materials you need

to keep it in this gauge.

The gauge is important to the pattern

because it's going to be a tapered cup.

That means it is wider at the top than it is at the bottom.

If you substitute a different yarn,

you're gonna need to check your gauge

and adjust accordingly.

But we have an interactive calculator.

Yay!

So go click down there.

It'll help you do the math.

It's approximately four inches tall.

You can make it shorter, but we've made it four inches

so that you have more room here

to stitch on a cool, funky design,

and if you've got big hands like me.

Let's grab our materials.

We're gonna need US 7 or 4 1/2 millimeter needles.

I'm using circular with 16-inch cords,

but you can use straight as well.

Be sure and grab a tape measure

if you need to measure and change your gauge,

as well as a tapestry needle for seaming and weaving.

Also, some scissors and maybe a stitch marker

if you wanna show what the right side is.

And then we need our yarn.

We're working with a medium 4 weight yarn.

This is a 100% wool from Red Heart called Chic Sheep.

There's 24 different colors.

So you can go from super basic colors

to really bold and do some fun stripes,

or use those for your duplicate stitch.

So let's grab that pattern.

Click on the link in the description below

to get yours, and we will take you

through all the steps you need from beginning to end.

And if you need more help, please click on the link below

for more stitches at a slower pace.

See you soon.

We're gonna begin by casting on 43 stitches.

Gonna make my slip knot and place this on my needle.

I'm gonna do the first part for you,

and then you'll complete that yourself.

And remember, there are links down below

for more information and slower videos

on different cast-ons.

Okay, we're gonna grab our yarn in our hand

and pull it apart with our two fingers,

our finger and our thumb.

Pull apart like this and then pull back,

and you're just going to scoop up.

Notice I've got my finger on this slip knot here.

We're gonna scoop up between the two stitches here,

this yarn here on the thumb.

Scoop up.

And we're gonna go down between this yarn here

on my finger, and down in the thumb area.

Then let go with the thumb

and kind of pull on that yarn that's the tail.

Okay.

I'm gonna do that again; you can see it from above.

You're going up through this hole here,

you're going down through this one here,

and that scoops the yarn.

And then you're sweeping and going down with the thumb.

And then let it go, and then pull on that yarn.

Okay.

And there we go.

You've got three stitches on.

You're gonna continue casting on

until you have 43 stitches.

Pause your video, and I'll see you then.

Alright, after you cast on, you're gonna take your needle

and turn it the other direction.

And you're not gonna work with this tail anymore.

You can go ahead and trim that or just let it hang.

Make sure you're working

with the working yarn coming from the ball.

Now, I'm working with a circular needle today,

but you can use a straight needle as well.

It just needs to have enough width

so you can get about 10 inches or so of stitches.

Okay.

So, we've got the first stitch here.

We're going to be knitting that.

We're gonna be working with a one by one ribbing,

so we're going to knit the first stitch.

So we stick our needle in the first stitch and yarn over.

Wrap that yarn around and pull it on through

to make the stitch, and then drop it off.

And then we're gonna go into the next one, which is a purl.

So we're gonna put the yarn back in between here

and then put the yarn into,

the needle into the first stitch.

Okay.

You're going in from the front.

And we're gonna purl, yarn over, wrap around,

and push a new stitch through, and let that fall off.

Let's do that again.

Put the yarn to the back, so between

the two needles so it's hanging in back.

Knit that stitch, yarn over, pull through.

Let that fall off.

Put the yarn between.

Put the needle in and we're gonna purl.

Push it on through.

If you hold the yarn in the opposite hand,

it's going to look like this.

You're going to knit the first stitch, like this.

And let it pull through.

And then you're gonna put the yarn to the front,

gonna put your needle in,

and yarn over, and pull through, like that.

And you've got your purl stitch,

and your yarn stays over here.

So you're gonna continue with knit one, purl one,

all the way across, and join me up at the end of this row.

See you soon.

We're at the end of our row one,

and you're always going to knit that stitch there.

And this is right-side row.

And so in order to mark that,

you can actually put a stitch marker in.

Now that you've completed the row, it's very easy.

Go ahead and just stick it in one of these stitches here.

Alright.

And then this is just gonna show the right side.

Alright, so we're gonna turn our work

and work on row two. (rustling)

Row two always starts on a knit one, purl one,

and you're actually going to purl one, knit one.

So a one by one ribbing just starts

with a purl one, knit one on the wrong side.

And so it's opposite as to the row one,

so it ends on a purl stitch.

So we've got purl one, knit one,

purl one, knit one.

And continue repeating.

And at the end of row two, you'll turn your work

and make another row one.

I'll meet you back at the end

when you've finished another row one after this.

See you soon.

Okay, so you should've completed one more

of the row one, which is actually row three,

and we've ended on a knit stitch.

And we're gonna turn our work and start

on the wrong side, which is purl.

You're just purling across all the stitches.

So we're just gonna purl all the way.

No more ribbing until the very end.

So we'll be making a stockinette stitch,

where all the wrong-side row is purl

and the right-side row is knit.

So you're gonna go ahead and work this stitch.

Do purl stitch, and then do a row of knit stitch,

and then do one more purl row.

So you'll be working three more rows.

We're gonna knit all the way across

after this row, and purl all the way across,

and I'll meet you back at the end here.

Alright, pause your video,

and I will see you in a moment for the increase.

Alright, we're back on a right-side row.

We're on row seven, and we've already done rows four

through six, which is purl, knit, purl for a stockinette.

And then we have an increase row,

and these four rows will get repeated.

So we're going to knit the first stitch, and then increase.

Now, you can make whatever increase

you're most comfortable with.

If you do a KFB, which is a knit front and back,

where we use this stitch, and then pull it

to the back, and then knit in the back,

that produces a purl bump here, okay.

We're gonna eliminate that purl bump

by doing something a little bit different.

You can also do a make one, where you

grab this bar here and twist it in the back.

I'm gonna do something a little bit different.

We're gonna grab this stitch back here,

and we'll call this the mother stitch. (chuckling)

It's the stitch on the row before that you had worked.

We're gonna lift it back up onto our needle.

So I'm just gonna pick it up, place it,

and then work our needle through,

and knit it just as if we normally would.

And then work the stitch that was already on there,

and then continue on your row.

And that leaves a no bump right here.

Alright, so you're gonna continue on row seven in knitting,

and then repeat those four rows three more times, okay.

So you're gonna have three rows of stockinette,

and then an increase row on the right side,

and then continue on.

You're gonna continue until you

have 47 stitches in total on your needles.

Pause your video, and I will see you at that point.

See you soon.

Alright!

So you've got your stockinette field, and your ribbing

down below, and 47 stitches across on your needles.

Now, where I've got my stitch marker,

I've moved it, this is about where you should be right now.

And you can see I've added about six more rows

of stockinette, so that's what you're going to do next.

You're going to knit a row, or actually,

are going to purl a row first,

because you should be with your yarn on this side over here.

And you're gonna purl a row, knit a row,

and then repeat that two more times

for six total rows of stockinette.

You can see that this side is straight

and this side over here is angled,

and we're gonna have this stitch marker here.

It's hard to tell on camera, but this is actually

just going straight up and down.

There are no increases from this point up.

So continue your pattern

for rows 20 through 25 for stockinette.

And at the end, this should measure,

from here to here, about 3 1/2 inches, or nine centimeters.

So at the point you should be now,

if your gauge is not the same is mine,

I'm about two and three quarters from here to here,

or 6 1/2 centimeters.

So you should be at 3 1/2 inches, or nine centimeters

by the time you reach the end of this stockinette.

Alright, pause your video, and I will see you

at this point and we'll begin the next part.

See you soon.

Alright, you're at your measured length,

the 3 1/2 inches, or nine centimeters.

We're on the 26th row, which is on the wrong side.

And we're gonna start our ribbing

opposite how we did in the beginning.

We're gonna work at row two, which is purl,

and then knit,

and repeat across.

Purl, knit, all the way to the end,

with the purl as the last stitch.

And then you're gonna repeat that row one,

as you did before, on the opposite side, knit one, purl one,

and then come back and do another one of these.

So we're doing three rows of one by one ribbing.

And pause your video, I'll meet you back up

and we'll bind this off together.

See you soon.

Okay!

So you've got your ribbing done,

and we're ready to bind off or cast off.

We're gonna do that "in pattern",

which means we're going to knit the knits

and purl the purls.

So we're going to knit the first stitch,

and then knit, I'm sorry, purl the second stitch.

Okay.

And then we're going to lift the front stitch,

the first one, over the second one,

leaving one on our needle.

And then we're gonna work the next stitch,

which this one is a knit.

So we wanna make sure our yarn is in the back first,

and then knit that stitch, and lift up and over.

And you've got one remaining, and so you're gonna

work the next one by purling

and continuing on from there.

I like to put my yarn back when I do it,

just 'cause it gets in the way for me.

Alright.

So continue on in pattern.

And when you get to the end, want you to leave a nice tail.

So you're going to have a tail probably about three

or four times the length of your seam here.

and we're gonna use this for sewing it up,

We'll do that together.

So pause your video, and I'll see you at that point.

See you soon.

Alright, you've come to the end.

You've got your last stitch, and go ahead

and cut off on the length to sew this up,

about three times this length, three or four times.

And pull out this last stitch.

So, this is a perfect opportunity

for you to go ahead and put on your duplicate stitch.

You wanna have this nice and steamed even.

This one's just a little bit rolling on me.

I had actually lightly steam blocked it

when I got to this point here,

so you're only seeing this part roll on mine.

If yours is more rolly, go ahead and block it.

You can pin it out like this, or you

can do a little bit of a steam block.

Just be aware of what materials you have.

So click on that link down below.

We've got a resource page for doing the duplicate stitch

with a video on how to do it, and a few charts for you.

You're just gonna work in all of these stitches.

It's just basically putting another color

on top and creating a design.

So you've got your basic one,

and now we want to move on to sewing it together.

Try and put on your duplicate stitch first

before you sew it, but you can do it either way.

Alright, pause your video.

Go ahead and get your needle ready,

and we'll sew this together.

See you soon.

Go ahead and thread your needle.

(rustling)

And got my yarn comin' out this side,

and we're gonna go from the top down.

So we're gonna go over this side.

We've got this nice knit edge going along here,

and we're gonna work into this bottom stitch.

Go right through...

The stitch here to connect,

pull on through.

And then we're going to work into these two stitches here

to complete that chained edge.

Alright.

And then we're gonna come back up through here.

And you've got that nice edge that's finished out.

And then we'll start working back and forth

across here to connect.

Alright, now that we're connected,

we're actually going to go through the purl bumps

between this column here and this salvage edge.

So we're gonna go in between the purl bumps

to the purl bumps on the opposite side,

and just picking those up.

And that will actually snug this all up together

and remove this edge here.

And we'll have a little bitty seam in the back.

but that won't matter.

So we're gonna pick up this first purl bump here.

This, I find, is the easiest way,

because you can see how to get it started.

So we're gonna jump across to the other side

and pick up the first purl bump over on this side.

And then go back across, pick up the next purl bump.

And across,

pick up the next one.

And you know that you did three rows, so I'm picking up.

You can actually count back down and say okay,

this was the third row, this is the second row,

this is the third row, and that way,

you kind know you're on point here.

So I'm picking up the third row on this side here,

and then the third row on this side.

Okay.

And so that pulls that together,

and now it continues that ribbing look.

And you're gonna go back over to this side and go up.

Now, this side right here is the one that was all

the increases, and this one is the straight one.

It's going to be easier to see this side here.

But this one over here, you're picking up

on some of them where there was an increase.

So it might be a little bit harder to see.

But on this side, it's gonna be consistently lining up

where this column is, where we had the purls.

So you can see that we're gonna go to the next stitch up,

which is going to be right here,

in between this column here,

okay, this little bar, and pick those stitches up.

And then come over to the next side,

and we're gonna go in one, let's see,

where were we the last time.

Okay, so we were here, and then we wanna go up one stitch.

And then go over to this side over here

and go up one.

I'm just goin' right through that bar.

And then go over to the other side

and go right through there.

I'll do one more and I'll show you

how it's kinda working up here.

One bar,

and over to the right again.

And if you follow along this very edge here,

you should be able to see it,

if you can see that I have been stitching this together

and it's bring the sides of these edges up nicely.

Okay.

So you're just gonna continue going back and forth,

and get to the very end.

And we'll meet you there for some final stitching, alright.

So just take your time.

And don't pull too tightly.

If you need to, you can kinda pull back

and see where you came from,

and loosen the stitches, and undo it if you need to

if you've never practiced this before.

Alright, pause your video,

and I will see you down at the end.

See you soon.

Okay.

And so when you get down to the end here,

where you've got the ribbing, you just wanna make sure

that you're lined up and ready to go.

If you need to work two stitches together

to get yourself lined up, you can do that.

You can grab two bars

from the same line to ease that tension

and ease the fullness, actually, is what that's called.

And that way, one side doesn't look all bunched up

and the other one isnit.

Okay, so I'm gonna go over.

Let's see, I'm goin' to this side.

I'm gonna go over here and pick up my purl bump

Oops.

And go over to pick up this first purl bump

and continue as I've been doing.

And then you will want to finsih off

by connecting as we did before in the beginning.

You're gonna connect

and finish off that look to the chain there.

Let's see.

My eyeball is deceiving me here.

Alright, I think I've got the last one.

So I'm gonna go through. (groaning)

This is where you kind have to eyeball it here,

and my bifocal eyes, (laughing) okay.

I'm gonna go through this end here

to the back, and then I'm gonna go around to the front.

And I wanna pull in the stitch that would line up here.

So gonna go through here.

K, so I'm creating the back end of this chain,

and I wanna do the front end of this chain

to go around to the front of this column,

'cause we're on this column here.

So we're gonna go all the way to this chain.

Okay, and that's gonna pull those extra stitches

to the back because you do have a seam in the back.

Alright, and so that makes that nice

and imitates exactly what you have along the edge here.

And then you can just turn it inside-out

and continue stitching that in.

And then you've got your tail.

And this is the original tail,

and you can just kinda go back through here

and weave in

your tails.

Alright!

So continue weaving in your tails.

And pause your video.

I'll meet you back at the end.

See you soon

(rustling)

And there you have your basic knit cup cozy.

And it is tapered, where it's smaller at the bottom,

bigger at the top, and you can design

any duplicate stitch pattern on the top here.

Use just the width of it, or fee free

and go all the way around to the side.

For ideas, go click on that link down below

and hit the Subscribe button with a bell notification

for your next video.

We have videoe every week here.

Thank you so much to Red Heart Yarns for the yarn.

And be sure and click on the comments down below.

Tell me what you thought, which designs

would you like to see in a duplicate stitch

to match your cup cozy?

Alright, and also, be sure and tune in

to the loom knit video for a basic cup cozy

if you like (classy piano music)

on the knitting loom.

Thanks for joining us today where we help you

stitch your love and love your stitches.

See you again soon.

For more infomation >> How to Knit | Basic Cup Cozy - Duration: 21:57.

-------------------------------------------

How to make the Keys and Bass sounds for Nathan Fake - The Sky Was Pink (James Holden Remix) - Duration: 16:04.

Hello this is Lucas Palmeira from Imaginando and I'm here to give you another tutorial on DRC.

Today I'm gonna show you how to make the bass sound, keys sound and pads sound for

'The Sky Was Pink' by Nathan Fake, James Holden remix.

So let's get right into it, and let's start with the keys..

What I'm going to do is,

Since we have loads of automation, I have to bring the patch back to default.

Here we have it, and let's start from the beginning…

So the first thing we do is drop one octave on the first oscillator [OSC 1] and second oscillator [OSC 2]

And change both to a square wave [SQR]

And fine tune OSC 2 to 0.044

Now raise the MASTER to maximum, PRE-GAIN to 0.601

OSC 1 to maximum, OSC 2 at 0.465

And finally we raise the RING modulation to 0.367

Now we got to the VCA and we raise VEL to maximum,

This means the higher the velocity, the higher the volume

Now for the pitch, EG 2 amount should be OK, now the CUTOFF we drop it to 0.348

And the RESONANCE at 0

Next we have EG 1 and we're gonna raise the ATTACK to 0.042 and the RELEASE to 0.191

Now we go to the EG 2 and we raise the SUSTAIN to maximum, and the RELEASE to 0.302

Finally we go to the reverb and we drop the DECAY to 0.172 and the AMOUNT we raise to 0.302

OK, perfect.

Now we go to the second keys and we do the same: bring it back to default patch.

Like the first one, square wave and square wave [for OSC 1 and OSC 2] and fine tune [OSC 2] to 0.044

Now we go to the AMP and we raise the MASTER to maximum.

The oscillators should be the same as the first one, so OSC 1 to maximum, OSC 2 at 0.465

And the RING modulation at 0.367

Now we raise the PRE-GAIN to 0.738

Now we go to the filter and we change the mode to a Band-Pass 2-Pole filter [B2P] and

we drop EG 2 amount to 0.284

The CUTOFF we drop it to 0.300

And the RESONANCE at 0

Now the first envelope generator: ATTACK at 0, DECAY at 0.178, SUSTAIN at 0, and RELEASE at 0.185

Now EG 2: ATTACK at 0, DECAY at 0.230, SUSTAIN at maximum and RELEASE at 0.302

Now we go to the delay and we turn the SYNC on and change the time to ⅛ dotted

Raise the FEEDBACK to 0.471, and the AMOUNT...

we're gonna leave at 0 for now, but it is automated so you can check it out afterwards in the [Ableton] session.

Now for the reverb we raise DECAY to 0.842, and we raise the AMOUNT to 0.660 like this.

This should be it, we got the second keys, now let's go to the bass.

And on the bass sound, bring back the default patch.

What we're gonna do is drop OSC 2 to -1 like this, [actually it's 0!] detune it to 0.76

And on the MASTER we put it 0.803

The PRE-GAIN at the same volume [0.803]

Now OSC 1 at 0.595

OSC 2 at same volume [0.595]

And the SUB oscillator at maximum, we raise 1 octave on sub oscillator and put it to triangle wave [TRI]

We change the performance mode from POLY to MONO

Now we drop EG 2 [amount] to 0.161

We drop the CUTOFF to 0

And the RESONANCE to 0.280 [not the release!]

Remember the cutoff is also automated, so don't worry if it doesn't [right] now

But you can change it and hear it and you can check the Ableton session afterwards to see what is happening.

So we want the CUTOFF at 0, the RESONANCE at 0.280

So we go to EG 1 and raise the SUSTAIN to maximum [not zero!]

And on EG 2 we raise DECAY to 0.458, SUSTAIN at maximum and the RELEASE at 0.061

So we got the bass, and finally let's go to the pad sound…

What I'm going to do again is to revert back to the default patch, OK.

And first OSC 2 one octave down, fine tuning at 0.028

And now MASTER at 0.308, PRE-GAIN at maximum, OSC 1 at maximum, OSC 2 at maximum

EG 2 at 0.791

CUTOFF at 0.240

RESONANCE at 0.172

Now on EG 1, raise the ATTACK to 0.608

DECAY at 0.504

SUSTAIN at 0.803

And RELEASE at 0.595

EG 2: ATTACK at 0.393, DECAY at maximum, SUSTAIN at 0.406 and RELEASE at the same 0.406

Now we go to the delay, raise the amount to 0.504

And the reverb, we raise the DECAY to 0.835

And the AMOUNT to 0.510

And this is it!

So let's now listen to the melody that I have recorded before, just bear with me for

a second while I put this online…

OK, I've done some noise sounds and some percussion with DRC as well,

You can check that out afterwards because you have the Ableton session available,

there are loads of automations to check out and see what's happening

But I think we got the gist of it, and I really hope you enjoy this because it was hard.

Let's hear it…

And this is it!

I hope you have enjoyed this tutorial, this was a tricky one because all the sounds have

tiny automations and expressions throughout the whole song

And you understand that most of the modulations were probably made live while operating directly

on the synthesizer,

I think we got really close to the sounds, and the main structure of the sounds

So you can use them and create your own things and own sounds.

This is probably one of the biggest techno anthems from the 2000's and it's a really great track.

I hope you have enjoyed this tutorial, dont forget we have the ableton session with all

the automations and all the sounds for you to check out afterwards.

This has been a pleasure, I hope to see you again next week guys, goodbye.

For more infomation >> How to make the Keys and Bass sounds for Nathan Fake - The Sky Was Pink (James Holden Remix) - Duration: 16:04.

-------------------------------------------

TIK TOK: What Is It & How To Use It To Your Advantage (Tik Tok 2019) - Duration: 7:55.

So I just found out about this app called Tik Tok, which apparently a lot of kids are using and like millions and millions of

People are just using it every day for

Recording videos and it's kind of like a new type of vine with music included if you want to check it out it's called

Tik Tok and as that logo it's tik-tok and

You know I would show you my phone but you can see in the recordings here basically

the types of videos that there are they're pretty much vines with music from music from

Musical.ly right you've heard of that

musical.ly it's basically like you, can make a video with

Music on the back end since the music is copyrighted

I'm not gonna add it to this video but in short these kids or these preteens or teenagers are basically creating

videos and short like 10 12 second videos of

themselves dancing or something cool happening and then putting the cool music and copyrighted music on top of that so

it's pretty entertaining I spent I pretty much spent like an hour

today just going through all these videos cuz some of them are very funny very very entertaining and

I thought it was really cool how just this app works and there's people on

here with like 20 million followers like already this app, was launched a couple months ago and

it has like millions of people on it and people have millions of followers on it built an amazing following just by creating funny

music videos so

the lesson from this

you know when I look at a new Apple when I look at a new service or something that's popping up and a lot of

People are using it the first thing that pops into my mind is

how can I use this to advertise myself my business and everything you know in between and I thought okay let me make a

tik-tok account and make some videos so I actually did you can check the link in the description for my account and

Essentially I thought, okay?

just treat this like snapchat

Advertising so it's pretty much the same thing where you can't buy ads although

I'm pretty sure Tech Talk will start putting ads on on their platform pretty soon it's gonna be the same thing like

snapchat but you can pretty much create 10 or 12 second videos with cool music

Showcasing your products on if you're into e-commerce you can showcase your products on

Tech Talk and gain a pretty significant falling just because there's no one promoting products on

Tech Talks there's just videos of kids dancing and having fun there's no actual businesses at all I

cried finding businesses and there's barely any

You know show can see the products on tic toc and it's a great way of like when for example

Instagram first started the first couple businesses that got onto it

End up ended up you know gaining millions of followers same thing can happen here on tic toc I think the biggest account is like

20 million 30 million followers and it's just like a 12 year old kid dancing and putting videos of him

you know funny videos of himself

There's no like, businesses with established accounts on tick-tock

so that's exactly what I'm gonna do with the app I'm gonna start advertising my e-commerce businesses and

myself my personal brand on tick-tock making videos with music and making it as cool as I can I

thought you know I would tell my followers and tell you to actually jump onto the opportunity of

Advertising yourself on there and just making videos of products other thing you can do to actually you know promote your business is contact

Some of these kids just there's like I found a couple of counts of like kids are like 15 18 year

Olds that have like 10 million tik-tok followers and they have no other followings and other

social media networks like they would have a million followers on Tik Tok and they're like 10 thousand on Instagram

but you can basically instead of reaching out and telling them hey, I want to advertise on Instagram with you just tell them

I want to advertise on tik-tok and just use them as an Instagram influencer but with ticks around probably next year in

2019 it's gonna be like huge probably this app is gonna be huge next year

And I'm reading up on stats on it and every day there's more downloads or more downloads and every week the app just gets better

and better and better you know in the tech and the team and it's built by musically like it's building a billion dollar company and

It's just gonna get better and better and better so

Yeah start doing those two things just start testing it out check out the app and make an account for your business

and start focusing your products start making a couple videos they might get like 10 100 views and

you know who knows if you make it entertaining enough it might just get like a million views and then you start getting a

Following because you have no competition there's literally no competition on

tic toc that's why it's so cool it's just it's not Instagram where you have to compete with like

hundreds of thousands of brands it's not Facebook it's not it's snapchat you're not competing with like hundreds and thousands of brands

you have no competition you're competing against kids making funny videos so it's like YouTube back in like

2009-2010 where people were like kind of growing and kind of building followings now it's kind of the same thing

If you start building a following now for your brand or for yourself even if you have a personal brand an ecommerce brand whatever it

Is if you start building a following now

I'm seeing a really like I'm seeing a trend on it I'm seeing like

Businesses are gonna start jumping onto it and advertising on it and then they're gonna build their own like ads platform or something so

You know we don't I really have no idea how the app is gonna develop

I'm just speculating it based on other social media networks and how they expand it and grow

So yeah get on to it if you want to download it it's the first thing in the description

They have no affiliate program so I'm I'm gonna make sylph if you click on that link or sign up or

Whatever I'm not gonna make any money they don't have an advertising thing that I just can't make money of the app

but sign up make an account for your business and start making like 10 second videos every day 10 second videos every couple days and

start advertising your business that's are promoting your products make cool videos with cool music all the music comes from

Musically so it's it's like modern music really cool

And you can just make the video with the music there and it can be a really really cool

Video that people actually share and everybody in tik-tok

kind of goes to because there's no other competition if they see a cool product like think about it like Facebook watch write Facebook watch

there's a lot of e-commerce products promoting their cuz it's big now everybody knows about it everybody in the business world knows about it a

Year and like when it was released I think it was about a year ago about a year and three months ago when

Nobody knew or eaten not even me I didn't even know about it and one of my clients actually told me in about I think

it was like December 2017 he told me hey Facebook watch

Launched and a lot of bits are jumping on it should we jump on it and I was like

Let's jump let's do it and we actually did and now he has a pretty significant

Facebook watch page should I client of mine and it's it's making money just off

People watching the video he doesn't even have to make ads it's just people watching the video on

Facebook watch and he makes crazy amounts of money just from people watching the watch video so yeah start it off with tick tock

I'm going to start off on my clients with my inner circle program and I tell them to

don't let it today and start advertising there cuz it could just be the next wave yeah it could just

Could just blow up very soon thank you so much for watching this video if you're interested in building a business

I'm not sure what kind of audience is speaking to in this video but if you're interested in building a sustainable ecommerce business in 2000

1920 and later on please subscribe to my channel if you like this video give it a like below share it with other people you

know share with your business partner so they know that they have to download tik-tok and they just

start promoting on it hey you so much for watching i'm rafael Cintron and I will see you in the next one

For more infomation >> TIK TOK: What Is It & How To Use It To Your Advantage (Tik Tok 2019) - Duration: 7:55.

-------------------------------------------

[Visiting Korea} 16 How to recommend #place #food - Duration: 2:05.

If you come to Korea, I would like to recommend you to try to go to some places in Seoul

N tower is in the middle of Seoul and you can look at the city at a glance

It's really beautiful

Please try to go to N tower

So when we talk about this kind of experience

we put 'once'

Please try to go to N tower

If you would like to chill, I recommend you to go to Yeoido Park

If there is Central Park in New York, in Korea we have Yeoido Park

Please try to go to Yeoido Park

And I'd like to give you a little tip

If you go to Yeoido Park, there are a lot of food trucks

They sell delicious foods in a cute truck

Do you like this?

Please try to eat this

For more infomation >> [Visiting Korea} 16 How to recommend #place #food - Duration: 2:05.

-------------------------------------------

SBE Council president on how Congress can help small businesses - Duration: 4:12.

For more infomation >> SBE Council president on how Congress can help small businesses - Duration: 4:12.

-------------------------------------------

How To Install Facebook Messenger On Your Website - Duration: 13:33.

- If you wanna turn your website visitors

into loyal messenger bot subscribers then keep watching

because in this video I'm gonna show you how to install

Facebook Messenger onto your website using ManyChat.

What's up, friends, I'm Heather Terveen

of heatherterveen.com and I help savvy entrepreneurs

use messenger bots in their business

to grow their bottom line.

Be sure to hit the Subscribe button below

so that you can be notified each and every week

when I drop a new video on how to use online marketing

to grow your business.

If you're marketing your business,

products, services online at all

then likely your website is your home base

and we don't wanna miss an opportunity to dive deeper

and connect even more with those visitors

and Messenger is a great way to do that.

So let's look at how we can install

a way for folks to subscribe to our Facebook Messenger bot

on our websites.

Alright, let's look at a couple of examples

as inspiration for you so that you can get an idea

of how you could use ManyChat to turn your website

into a way to capture leads

so that those lurkers on your website

can actually turn into loyal fans.

So here on Tammy Cannon's website

of cannononlinemarketing.com,

she's a Facebook advertising pro, I installed a quiz,

an invitation for her Facebook ads quiz

that gets delivered through Messenger

and here, if you click the Send to Message button

then it will give you an opportunity

to actually go in and take that quiz

and by clicking these buttons and clicking through here,

we get an opportunity to take her quiz

and also become a subscriber to her bot.

Now, a couple of other examples just visually here

that I made for you so that you guys could know

is you have the option of a bar here

that could sit at the top.

If you see on my website here,

want to experience a demo bot for yourself

and they can click here

and become a subscriber to my bot with a bar.

Here's a page takeover example

and like the others, it's just taking over the page.

There's the slide in example and then we have the modal

which is the one on Tammy's website

and is the example that I'm gonna create for you today

inside of ManyChat.

Okay, so once you are signed into your ManyChat account,

you're gonna go over to Growth Tools down here

and then click on Widgets and then you're gonna go over here

and click on New Growth Tool

and I'm going to call this Tutorial with a Modal, okay,

and then here we are going to select the modal

which is that example that I showed you in here

and here we are in here.

So for the sake of time,

I do have one already prepped out over here

so that we can kind of copy in peace

and get through it quickly

but I don't wanna just show you something already created

'cause I just don't think it will show you

how to do it as well.

So on the first page, we're given that initial,

what the initial overlay modal

on your page is gonna look like

and there's many ways we can tailor it

for whatever it is that you are offering folks.

It could be a lead magnet.

It doesn't have to be, it could be a special message,

a special tip, a special short video

that you've done just for them, something to entice them

to actually click over and join you on Messenger.

So for me, the example we're gonna use is that I have

a Ultimate Messenger Marketing Getting Started Guide

and so we're gonna use that as the example

since a lot of the people who follow me

are interested in Messenger marketing

and so I've got my text in here,

ready to get started with bots

and then what they actually get

and then I expressly tell them

that I'm gonna send it to them in Messenger here

and obviously it's over here as well

and then here we can use our brand colors here

if you have certain pantone colors that you use.

So let's put my colors in here.

You can make the button blue or white.

Blue or white.

We can change what it says.

It can say Get This in Messenger and it changes.

You could add an image like you saw on Tammy's example

and then you can customize it

based on when you want it to actually show up.

The default is 30% scrolled

and then when the widget will be shown to the same user.

I'm just gonna put one in here but you decide for yourself

and then if manually closed by a user, show after never.

You can decide for yourself.

You could say never, always, hours, days, what have you.

So let's, then we're gonna click the Save

so that that part is saved and then we're gonna hit Next

but I just wanna kinda show you up here

that the steps are up here as well.

So we were just in the Initial State.

When we hit Next, we're gonna go Submitted State

then we're gonna do the Opt-in Actions and then the Setup.

So up here it kinda shows you the steps as well

but let's click the Next.

So this is that message that they receive

after they've clicked on the initial popup

that they see on this screen.

So let's go to the Submitted State on this one

and then I'm just letting them know

to go check it out in Messenger

and I add some emoji arrows here

'cause you wanna be really clear on where they need to click

and then here let me grab this color,

another one of my brand colors here

and then, change the button to that yellow that I like

so it pops a little bit more and there we go.

Now we have the Submitted State set there.

Again, you could add a picture and we're going to click Next

and now is the Opt-in Action.

Now, for me, I might replace this

and grab another flow 'cause it's usually what I do

'cause I have so many flows

but if you're just starting and don't have anything created,

I wanna show you how you can just

simply create something quickly

and then also as a note,

since this is a way for people to subscribe to you,

you could also subscribe them to a sequence here

and that would be like those dripped message,

drip messages that you have for folks.

So if you wanted over the course of 10 days

for them to receive say a message every few days or so,

you could create a sequence and then subscribe them

to it right here.

So if you want to create one from scratch

and you don't have a flow that you wanna use already

for an opt-in message,

I'm gonna show you how to do that right now

but it's prompting me to save of course.

So let's go in and edit that.

So this is kind of the more linear builder.

I'm gonna use flow builder

'cause I like how it shows all the steps.

It gives you kind of an overview.

So, so let's say hi first name.

Can I give you the Messenger Getting Started Guide

below as promised and continue to teach you

about messenger bots here?

Yes.

Okay.

Alright.

So then we can kinda come over here

and back up a little so we can see it

and then after that we can say grab the guide below.

I'll be in touch later in the week.

Okay.

Not my best copywriting right now but you guys get the idea

and then below I could grab from attachment,

The Ultimate Messenger Marketing Getting Started Guide

and attach it right there so they've got the guide

and then while that's populating,

just so you know you can hit the Preview button

and actually look at what this will look like

when it's delivered inside of Messenger by hitting Preview.

Alright, so now we have our opt-in message all ready to go.

Let's go back to Edit Flow.

We're gonna hit the Publish button

and then we're gonna go back to our widget

and so that was the opt-in action

so now we have our opt-in action all set up

so that they respond inside of Messenger

and confirm that they do wanna receive

what you promised them they would receive

when they clicked on through

and now the final step is to go on over here

and actually install this on your website

and the way that you want to do this

is by clicking this Install JavaScript Snippet

and here you can just type in the website

or if you're using lead pages or click funnels,

whatever you might be using right here

and then you'll click on over to Install ManyChat Snippet

and then you'll copy this to your clipboard

and you will place it into the head

of every page of your website

so if it's WordPress or Squarespace or whatever,

whatever you're using for your website,

you would install it in the head there

and then on, if you're using,

quick tip, if you're using lead pages or click funnels,

you can do it as well

and install it on a page there as well.

I believe you have to actually go to the custom CSS

in order to do it there.

So step number one, if you haven't already,

head on over to manychat.com and at the very least

sign up for a free version of their software

and connect it to your Facebook business page

and also if you could comment below

and actually drop your website URL into the comments,

I would love to learn more about your business

and check out your website down there.

So now you know how to install Facebook Messenger

onto your website.

If you're interested in taking a messenger bot

for a test drive,

be sure to hop on over to heatherterveen.com/demobot.

I will drop the link in the show notes as well.

If you liked this video, will you do me a favor

and hit that thumbs up button below and leave me a comment.

Also, be sure to subscribe to my channel

and I cannot wait to connect with you next week

where I have a new video

that will help you grow your business this year.

For more infomation >> How To Install Facebook Messenger On Your Website - Duration: 13:33.

-------------------------------------------

How To Give Constructive Criticism To Your Boss - Duration: 11:49.

Welcome back. So you are here today because you have someone you want to

give feedback to. Might be a boss, it might be a spouse, someone in your family.

In this video, I give you 7 steps on how to constructively criticize that

will help you maintain and improve those important relationships. Alright. So

you're here probably because you have a boss or some authority figure over

you right now that you just see them and and you know they could be doing

something better, right? That you want to give them feedback and you want to give

them constructive criticism but you want to know how to do that. We're going to be

talking about 7 steps in this video on how to give constructive criticism. I

found this very valuable in my life as I was looking out at Facebook. Facebook is

a great place where people like to criticize people, right? And it's not very

effective for the most... The most part as I've been watching this. So as I've

watched people criticize and critique authority figures, I've started

to ask the question "How?" How can you give effective constructive criticism? In

a way that does not hurt the person, does not hurt yourself. But at times, as you're

feeling, this feedback could be beneficial, right? So, here's how to do it.

The first step, when you have an experience happen where you're like, "Oh, I

should give this person some feedback." The first time you have that experience

happened, ask yourself first. The first step is "Self First." So, look at yourself

first. And with Self First, what you do there is you look inward and you say,

"Okay, is this about me or is this about them? What is this going on in me? Is

there emotion that I'm struggling with? And do I need to deal with that?' So, you

look at yourself first and you say, "Is it about yours, about them?" It's about you,

you address it. And you identify what the emotion is which goes to the second part.

Which is "To Release." So, as you address it with yourself first, you say, "Okay, here's

this part in me that's dealing with this. Here's where I've got some blocked

emotion or something that needs to express. I release that in an appropriate

way so I don't take that anger that frustration out on my boss or that

authority figure or my spouse or whoever it might be. I don't go and dump it on

them. I release it in an appropriate way." Which are techniques that we talked

about in other videos on this channel. So you can look up those. So release it in

an appropriate way which is not dumping on other people. So you release it. And

then once you've released the emotion, check in again. "Okay, is this feedback

still necessary?" Because sometimes, you'll find out that that feedback that you

wanted to give was really just a trigger inside of you. Where you had some blocked

energy and emotion that is you recognized it and you brought it up and

you identified you released it. Now, there's no problem anymore.

So, I don't actually need to go talk to my boss. I've already taken care of it.

And that's beautiful when you're able to do that because often times that is the

case. However, sometimes it'll be like, "No, this feedback is still necessary." So from

that point, you go to step 3 which is the relationship. Step 3 is the

relationship. So you look at the relationship and say, "Okay, am I is steward

over this person or as this person is steward for me? Or is it a neutral

relationship?" There's 3 different types of relationships you can have.

steward is responsible or accountable for. So, if I am responsible for my

children, I become a steward for my children. I am the steward for them. Your

boss is a steward over you. Your boss has Authority and responsibility over you.

And so recognize that relationship. If it's a co-worker they are most likely

just on a neutral plane and there's the relationship is neutral. So that is

important to realize. Because if it's your boss, maybe it would not be helpful

to share that because they told you to do something and you just reacted and

you're like, "I don't really want to deal with this." And so you had a reaction and

sometimes helping doing the release will solve that. Because I just didn't want. I

reacted to what they told me to do. And yet they had the right to tell me to do

that. So, recognize that stewardship. Your children. if they come to you and say, "Hey,

you need to make us this for dinner." They don't really... They don't really have that

right to tell you what to do for them because you are the authority figure

reaching out and then the steward over them. So even if they tell you what to do,

you still have that choice to do what you feel is in their best interest. So

recognizing the relationship is huge. So, noticing the relationship that this

is your boss, is the feedback still necessary. And how do I give it? Okay? Yes,

this feedback would still be beneficial even though they're my boss. Yes, I want

to do that. Which leads to the next step. Step number 4 is in person. In person.

This is huge. You don't go on Facebook and say, "Oh my goodness, this just

happened and my boss is such a nerd and I dunno nah da da." So don't do that. Don't

text them and say, "Hey, by the way, you could have done this better." Oh, that

probably won't go over so well either. So, what I would do in what step 4 suggest

is you do this in person. In person. So you don't do it over the phone where you

just talk. You've got to be able to see them. See face to face. Now, you could do

this over video conferencing if there's somewhere across the world. Do it over

video conferencing. FaceTime, something like that somewhere where you can see

their face. But do it in person. Ideally you would be able to be flesh to

flesh in person. Seeing each other sitting down with each other. Saying, "Hey,

can I take you to lunch and I can I talk to you about something?" And so you sit

down and there you are talking to one another in person. And the

great thing there is, in person you can gauge so much more than words alone

leave out. Because words alone are only like 7% of what's communicated. 93%

percent of what's communicated is body language. So that is very important to be

able to connect with that body language. And so it's very important to be in

person and ask permission. Ask permission. That's huge. So, the next step is

positives first. Positives first. So here you are. you're in person. You're talking

to each other. Share the things you're grateful for. Share the things that they

are doing well. The things that you like about them. Share the positives first.

Because there are positive things with all of us in any given situation. I

understand that sometimes when you're in that trigger mode and they do something

and you're like, "Oh, I just need to tell them what's up and and what to do."

Sometimes we're not looking at the positive but there's always positives. So

look for the positives and let them know that you see the

positives in them. Express credit too. Hey. thank you for allowing me to work at

this wonderful company. I'm grateful for the opportunity we have to serve. Thank

you for doing what you're doing and in building this company. And wherever

that expressed the positives. And then and only after you express the positives

then the next step is to give the feedback. Here's where you give the

feedback. And so that point you say, "Okay, thank you for all this. Would you mind if

I give you some, some feedback?" Ask permission. If your boss says, "No, I don't

want that." Respect it. Do not go any further. Because if they

say no and you cross that boundary, first off you ask permission, they said no and

then you do it anyways, that just shows that you don't respect those boundaries,

you don't respect their requests. Which is important to be able to respect those

requests. So if he says no or if she says no, respect it. Okay, enjoy your time

together. Just finish talking and then move on. You know, it's not your job if

they're your steward. Your job is here you know as... Their authority figure over

you. So be okay with that. And if you need to release some more, release some more.

And move forward. You get to choose to stay on that job. If you don't want to be

there, you can move somewhere else, okay? It's not your job to tell your boss

necessarily what to do especially if they don't want to hear it. Now, if they

say, "Yes, I would like some feedback." And I guarantee you that if you follow these

steps, they will be more likely than not open to receiving the feedback. The

majority of the time, if not, all the time, they will be open to receiving the

feedback because you've done the work. You're doing this in an appropriate way,

And they'll say, "Yeah, I'd be great... I'd be glad to hear some feedback. What do you

have?" And at that point, you can give the feedback. You give the feedback. And if

they say, "Huh, that doesn't really work with me." That's fine or they might accept

and say, "Thank you for that feedback. that's really great insight. I appreciate

that." And they take it in. That's beautiful. And then the next step is the

positive reminder. So again, that's the feedback and then thank you again for

the good that you're doing. I appreciate you I love having being able to work in

this area and you're doing a great job. So, that's reminding them of the

positives. So positives, give them the feedback, give

them the positives. I've heard it said. "Give them pie praise." Praise them for

what they're doing. Instruct is the feedback and then encouraged. "Hey,

you're doing a great job, thank you, you can keep going." So, give them the feedback

and then remind them to positives. And then there's a bonus here. You don't have

to do this but you can. And the bonus is ask for and receive feedback yourself.

Now, this is beautiful because if you are wanting to give feedback, the fact that

you then sit down and say, "Hey, and do you have any feedback for me? Is there

anything that I could do better?" That's powerful. Because that shows that not

only can you give, you can also receive. And you're looking to improve and do

better. So these seven steps with the eighth bonus step, I guarantee as you use

these, you will see your relationships improve. And not only your relationships

improve but you will see effectiveness happen in those relationships as well.

People will be more open. Now this works with you talking to your boss but it

also works with you talking to people that you are stewards over. That's part

of where you recognize the relationship and if I'm a steward over them. Because

sometimes if it's your children and they say, "No, I don't want any feedback dad."

Guess what? You as their parent an authority figure, you as the steward over

them, still have a right to give them the feedback even if they say no. Because of

where it is. And it sometimes depending on the situation, you don't even need to

ask for permission. You just give them the feedback and the instruction. And

that's helpful as well neutral is a little bit different because now we

don't have a, "I'm not a steward over you, you're not a steward over me." It's a

neutral relationship and it's open. If they're open to it and great if not,

that's okay too. So, I encourage you to live and love, to look at yourself first

when you have feedback that you want to give to people. To release anything in

you and then to do it in person. Focus on the positives, give the feedback

appropriately and see how our relationships improve. Please don't do it

on Facebook. Please let's stop that and do it in person and love one another and

see each other for the amazing miracles that we

are. Because we are all valuable, we all worth it and let's do it in a

constructive, positive way. So thank you for being here with me. If you enjoy the

content, below go ahead and like it, subscribe to our channel and we look

forward to seeing you again soon.

For more infomation >> How To Give Constructive Criticism To Your Boss - Duration: 11:49.

-------------------------------------------

How to play Fortnite Season 6 free kill - fortnite best moments - Duration: 4:09.

How to play Fortnite Season 6 free kill - fortnite best moments

For more infomation >> How to play Fortnite Season 6 free kill - fortnite best moments - Duration: 4:09.

-------------------------------------------

TONKO HOUSE IRON CHEF ーーHow to make homemade ice cream - Duration: 7:02.

For more infomation >> TONKO HOUSE IRON CHEF ーーHow to make homemade ice cream - Duration: 7:02.

-------------------------------------------

[Hindi]How to Add End Screen Annotations On you tube video| you tube tips & trick| by chillyfact - Duration: 3:05.

For more infomation >> [Hindi]How to Add End Screen Annotations On you tube video| you tube tips & trick| by chillyfact - Duration: 3:05.

-------------------------------------------

How to Make Leftover Turkey Tetrazzini as Prepared by the Flying Rhino Cafe - Duration: 5:40.

Hey, welcome to the Flying Rhino.

I'm Paul and this is my wife Melina.

And we're going to use some turkey leftovers to make a really great comfort

food, Turkey Tetrazzini,

which is a casserole that is great thing for a cold November day.

So we're gonna get this pasta going by adding some egg noodles to it.

So while our pasta is cooking, I'm going to work on our sliced mushrooms.

I have baby bells here.

So it's just a simple little slice.

So we have approximately a pound and a half of mushrooms here.

Get an onion diced up.

I want to try and get not a fine, fine dice, but

a medium fine dice.

And those are gonna go into a nice hot pan.

Alright, so I'm gonna throw my oil into my hot, hot, hot pan.

Oh, yeah.

It's smoking.

We're gonna throw in our mushroom that Melina just sliced up for us.

Get that sautéing.

And that's what it's supposed to be doing - dancing in that pan.

With the onions, same thing.

Just let them get in there.

You want them to

get sweating again.

And then we'll do our garlic.

Put that in.

I like putting it on the hot pan itself.

Now I'll flip it around.

Looking pretty good.

So now we want to deglaze with our sherry.

We're gonna really flame it up.

So now we'll put this aside and move onto our next step.

So we got our half and half here.

We'll bring our pan over for our roux.

For our roux, we're gonna have our butter we need to start melting.

We're just gonna just gonna make a blonde roux today.

So as that melts, we're got out cream getting warm.

Now we're gonna add our chicken stock, our turkey stock.

You have left over turkey juice drippings, use that.

So we're gonna mix that right in there.

We're gonna take our flour over here, we're gonna add that right on.

Sprinkle about half of that in there.

Take our wooden spoon and mix it in.

And once that's incorporated in we'll add the rest of that flower.

And let's gonna take it a little bit off that flame so it's not too hot.

And I don't get it really brown looking.

We're trying to get a blonde roux here.

And in the meantime, I'm gonna add my cheese to my stock and cream that I have here.

We're going swiss cheese and cheddar cheese with it.

And that cheese is starting to melt in that sauce of ours.

So now, I'm gonna incorporate a little bit of that hot sauce into our room,

getting the two hot products together, and that's looking good.

And now we're gonna go the other way.

Right into our cheese sauce.

I do want it nice and thick because in the casserole we want a nice cheesy,

creamy dish.

And now I'm bring our mushrooms back over, and I'm gonna add this to our

mushrooms and onion and garlic.

And I'm gonna do a little cracked pepper, and now that finished my part.

We're gonna hand this back over off to Melina and she's gonna finish off the

dish.

This is the easy and fun part.

I have approximately two cups of turkey that we had left over from our

dinner.

I have some frozen peas - nice color.

Our delicious sauce Paul just made.

We're just going all in on this.

Smells really great.

It's gonna be delicious.

So you're gonna spray the pan just to ensure no sticking.

And we're gonna take our delicious mixture, go ahead and dump it right in.

Spread it around a little bit.

Now we're just gonna top it with our crushed potato chips that I put in the

food processor earlier.

Here we go.

And a touch of paprika - give it a little bit of color before it goes into

the oven and of course it's going to get nice and golden brown once it's

comes out of that piping hot, 375 degrees.

Oh, nice and bubbly just like we want it.

Looking good.

Since we are working with our leftovers, we are using some butternut puree

that we had with dinner yesterday and I have a little bit left.

Give a little sweetness against some of that cheesy, mushroomy goodness.

I have some arugula here.

A little bit of parmesan cheese, a little olive oil.

Fresh cracked pepper, pinch of salt.

And you know what?

It's kind of nice to throw in a little shallot as well, add

a little crunch to the salad.

Throw that in there.

So I'm gonna cut out a nice corner piece here.

First piece is always the hardest to get out, but you can see all that ooey

gooeyness right there, honey.

Alright, so there it is.

Our Turkey Tetrazzini made with leftovers.

And shall we say bon appetite.

Of course.

For more infomation >> How to Make Leftover Turkey Tetrazzini as Prepared by the Flying Rhino Cafe - Duration: 5:40.

-------------------------------------------

Firefighters give tips on how to get out of your house if it's on fire - Duration: 2:36.

For more infomation >> Firefighters give tips on how to get out of your house if it's on fire - Duration: 2:36.

-------------------------------------------

How To Sing from Chest to Head Voice Without Breaking - Duration: 8:05.

Having a break in your voice as you sing from your chest voice into your head voice is embarrassing

and frustrating.

Inside this video I'll help you stop breaking completely...not just cover it up or smooth

it out..but eliminate it.

Watch!

Hi I'm Chuck Gilmore with Power To Sing.

Some years ago I attended a performance in a large venue with over 20K in attendance.

A world famous choir was performing with an renowned international Bass-Baritone.

In the middle of one of his songs he massively cracked.

It wasn't just a little crack, it was a big one.

So much so that I wondered if he was fighting a cold and this why such a skilled singer

cracked.

But no matter the reason, years later I remember it and I bet he remembers it... all too well.

Pavarotti had the same thing happen to him.

He said people booed him.

Audiences can be very unforgiving.

Here are two vocal exercises and one trick you can use to eliminate the break in your

voice.

By the way, if you are new, be sure to hit the like button, subscribe, click on the bell

so you get notified, and share with a friend.

Before I share these, let's talk about why breaks happen.

Illness.

You are sick and your vocal cords are swollen.

This requires you to be perfect in your technique.

Even then, you might still crack after all you do to prevent it.

You pull your chest voice too high.

This is one of the most common reasons you break routinely.

Your larynx is to high.

This happens when you strain and reach upward for the high notes.

By habit you just let go into falsetto so no one can hear a crack...even though the

results are the same...you've broken the tone by going into falsetto.

Exercises to Sing from Chest to Head Voice Without Breaking

Exercise One If I could only give you one exercise to eliminate

the break here it is: Ney

For this to work you must do the exercise correctly like this.

I'll show you 3 scales you must master.

Soon you will have no break.

[Demo]

There are several key principles about this exercise.

First, you must stay with the exaggerated, witchy sound from bottom to top.

If you let go you aren't doing it right.

[Demo]

Next you must begin doing this exercise softly while maintaining the witchy, exaggerated

sound.

Doing this correctly results in eliminating the weight of the lower voice as you ascend

in pitch while not letting go into falsetto on the higher pitches.

Gradually eliminate the witchy sound until you are able to do the exercise in your normal

singing voice while keeping the tone connected.

Exercise Two You must keep the larynx down at the level

where you speak.

Otherwise you will always be fighting this break.

You can retrain the larynx to stay low with this exercise: Gee

For this to work you must do the exercise correctly like this.

You must master the same three scales as above.

Soon your larynx will stay lower where you speak.

[Demo]

There are several key principles about this exercise.

First, you must stay with the exaggerated, dopey sound from bottom to top.

If you lose the dopy sound you aren't doing it right.

It will get hollow or hooty as you ascend in pitch like this: [Demo]

Next you must begin doing this exercise softly while maintaining the dopey, exaggerated sound.

[Demo]

Doing this correctly results in keeping the larynx low at your speech level as you ascend

in pitch while allowing your voice to go hooty on the higher pitches.

Gradually eliminate the dopey sound until you are able to do the exercise in your normal

singing voice while keeping the tone connected.

One Trick that Works If your voice strains or feels like it's

going to crack on a high note, narrow the vowel of the problem word.

For example, while singing the Star Spangled Banner, the vowels of the words in the phrase,

"rockets red glare" would be narrowed to "ruckets rid glir".

By narrowing the vowel, "ah to uh", "eh to i" and again "eh to i" your voice

won't feel strain, you won't crack, and your head voice comes in easily.

[Demo] For a more detailed video about vowel narrowing

watch for a video link at the end of this video.

Other exercises to eliminate the break can be found in the exercises for your vocal type.

To get your vocal type and exercises that eliminate straining, cracking, breaking and

falsetto these are available in the PDF, "Get Your Vocal Type".

Get the PDF now my clicking here or you can find the link in the Youtube video description

below this video.

This PDF will take you to a vocal test, which I call the PowerTest.

This will give you your vocal type, and it contains links to videos for each vocal type,

together with exercises for men and women that will help you to sing from chest to head

voice without breaking.

I'm Chuck Gilmore with Power To Sing.

You can sing higher with beauty, confidence and power.

I'll see you inside the next video.

For more infomation >> How To Sing from Chest to Head Voice Without Breaking - Duration: 8:05.

-------------------------------------------

How to play Fortnite Season 6 free kill - fortnite best moments - Duration: 2:10.

How to play Fortnite Season 6 free kill - fortnite best moments

For more infomation >> How to play Fortnite Season 6 free kill - fortnite best moments - Duration: 2:10.

-------------------------------------------

ఎలాంటి కోర్ట్ కేసులు అయినా తొలగాలంటే | How to Solve Court Case | Court Case Solution | Court Case - Duration: 5:25.

PLEASE SUBSCRIBE

Không có nhận xét nào:

Đăng nhận xét