How To Get FREE XBOX Gift Cards - Xbox Codes - Xbox Gift Card Codes
How to Clean Copper Vessel ? | Just Dip and Clean
Đăng ký:
Đăng Nhận xét (Atom)
-------------------------------------------
How To: Download a Free Resource - Duration: 1:29. For more infomation >> How To: Download a Free Resource - Duration: 1:29.
 -------------------------------------------
how to: STRING ART FLOWER | TUTORIAL | timelapse + RUS sub - Duration: 5:56.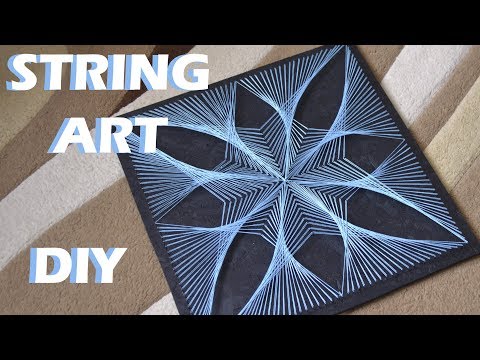 For more infomation >> how to: STRING ART FLOWER | TUTORIAL | timelapse + RUS sub - Duration: 5:56.
 -------------------------------------------
Travelling Alone for the First Time | How to take a Connecting Flight - Duration: 6:58.
Alright,
So today's gonna be a big day. First off i'm flying solo for the first time.
Which I don't think is gonna be a big deal but I'm gonna be documenting it so I guess that's pretty cool for me anyways.
But I am taking a connecting flight
First time I've ever done this before. I didn't think about it when I booked the flight.
I just booked it cuz it was the cheapest one but now it's a day that I'm flying out, I'm a little bit nervous.
I've seen other YouTube videos do this. How to take a connecting flight?
They mostly just sat in their room and talked about what to do and what not to do.
So this one's gonna be a little bit more different. This one's gonna be a real in life experience
Anyways, I'm a little bit nervous about that but I hope it goes well. It's 45 minutes to take the connecting flight.
Basically when I land people are going to be boarding the other flight. So I'm gonna have to move quick.
I'm a little nervous. I should have thought about this before
But yeah, I guess that's this how it goes. Anyways, let's get to the airport. Oh
Wait, one more thing I forgot to mention.
This is a international connecting flight. So I'm gonna have to pass through customs, too. I'm not sure exactly how this works
I'm getting a little nervous thinking about it. So I guess we're gonna just start this day off. Let's get to the airport
Alright, so I hope you got a good view of what Vancouver Canada looks like
I'm driving along the outskirts. So it wasn't downtown or anything like that.
So anyways, I'm not parking at the airport. I guess you already figured that out
I'm a little bit cheap. If you're flying out of YVR. There's a train that goes straight from the airport
So there's no point actually parking and paying insane parking fees, but I am arriving back here late at night
So I just hope I don't get towed here. That's the only thing.
Anyways, let's get to the airport
All right. I don't think I'm gonna get broken into but I'm a little worried i'ma get towed, but I guess I'll risk it
I'll find out the end of this video of what happens. Alright, let's go.
Alright, so whenever I get to the airport always feels super rust
But today I got here extra early now. I got a little bit of time. I don't know what to do with
Probably get some food. I already checked in.
Go through security and all that hassle so i'll get some food. I'll show you what some Canadian fast food looks like
Look at this
So the one thing about arriving at the airport so early is there's just nothing to do
But I'm still a little worried about that connecting flight.
45 minutes is just very quick. I guess I'll find some shots to take here at the airport.
Alright, so something I wasn't aware of is that in all major Canadian airports you go through US Customs
Before you take off which was a huge relief
Since I had only 45 minutes to make my connecting flight and not having to worry about going through immigration
When I landed was so nice
So if you do go through any Canadian Airport to the US you do go through customs
Before you take off. As long as it's a major airport.
Anyways, once I landed I was in super panic mode. I wasn't too sure exactly where to go or what to do.
I got to this board right here and if you're ever looking for your connecting flight
They group all the airlines together. So whatever airline you're flying out of
There gates. All right beside each other
Lucky for me and I maybe unfortunate for this video is my gate was only two gates down
So I literally got off the plane. I looked around made this walk right here, and I was at my gate
Well, there was no need to worry my flight was delayed anyways so I got some time to kill found this wheelchair
It's actually pretty hard to move around
I'm not that strong I guess.
So this is what I'll be doing for the next hour
I
Better not leave this here. This flight end up getting delayed multiple times that night
But I can say on the returning flight back
I had the same connecting flight a very quick turnaround of around 45 minutes
And they actually dropped me off in a different terminal. Which I think is kind of rare.
They warned us before we got off the flight what gates we should go to
And it was literally an a different terminal. Which is so crazy
I had to run around and by the time I got to the desk to board the next flight
Everyone was on board. The flight literally took off like 10-15 minutes later
I wish I filmed it but I actually thought it was going to be a super easy turnaround again so I den't do it
Alright, let's go back to the original flight
It finally took off several hours later. Well past midnight.
Alright, so that's how you take a connecting flight
Man, does the airport ever make me tired.
I never did tell you where I end up going. If you're curious like the video and subscribe to the channel. It really helps
I tell travelling stories and go on adventures. So like the video and subscribe to the channel. You'll
Get to see where I end up going. Alright until later. I'll see you later. Have a good night
Whoa, it's still here
No ticket perfect
-------------------------------------------
How to get over Writer's Block (Overcome Writer's Block) - Duration: 13:26. For more infomation >> How to get over Writer's Block (Overcome Writer's Block) - Duration: 13:26.
 -------------------------------------------
Hand Embroidery;How to Make colorful Braids, Rose flower stitch - Duration: 5:38.
Mowsumi Embroidery
-------------------------------------------
YouTube Marketing Bangla 2019 (Full Youtube Marketing Course) | How To Earn Money on YouTube Bangla - Duration: 5:19. For more infomation >> YouTube Marketing Bangla 2019 (Full Youtube Marketing Course) | How To Earn Money on YouTube Bangla - Duration: 5:19.
 -------------------------------------------
How PG&E safely stores used fuel at Diablo Canyon Power Plant - Duration: 2:11. For more infomation >> How PG&E safely stores used fuel at Diablo Canyon Power Plant - Duration: 2:11.
 -------------------------------------------
See how Transblue works better together with the help of Microsoft 365 - Duration: 2:04.
(upbeat music)
TransBlue is a family-owned business
that provides outdoor living
spaces for residential customers.
At TransBlue, 100 percent customer
satisfaction is the only thing we do.
If we don't do it right the first time,
that means we have to go back out
and we have to be out there longer,
that is always the biggest challenge for us.
Before we joined Microsoft 365 Business
everything was done on paper.
From the sales,
from the project management,
even into marketing.
It caused a lot of confusion
and problems for us
and hours in every day were lost.
Having a person in the field not having
the right information didn't give us
any version control,
any data integrity.
There was a genuine concern
that people weren't always working
with the most current data.
Now, with Microsoft 365 Business,
we can all be in constant
communication and provide
clarification whenever we need it.
Today one of our sales people can go out
to a project, he can take photos, write an estimate,
open up Teams and upload it into SharePoint
right from the homeowner's location.
Everything's in the cloud,
everything's in our Microsoft teams.
It's so much easier to use,
and it's so much more efficient.
The amount of time savings and productivity increase
that we get is almost immeasurable.
Microsoft 365 Business allows us
to have quick communication with the office,
but also to have those face-to-face calls
with just a quick Skype for Business call.
Skype has really been a game changer.
All the different people in the different locations
can access me just that quickly.
I can look at what they're doing,
make a few suggestions.
Something that can take half a day,
instead I can do in a few minutes
right from my desk.
Microsoft 365 Business
has been so fun to work with
and learn and has made
my job so much easier.
It saves TransBlue money
it saves our customers
a lot of time, and that has greatly
improved our customer satisfaction.
Microsoft 365 Business has allowed me
to scale up the amount of work we do
because it provides efficiencies
that just aren't available without it.
(upbeat music)
-------------------------------------------
How to make a Guitar Neck - Duration: 10:53.
What is up everyone welcome back to this episode of Home Built Workshop. Today is an
episode that a lot of you have been waiting for, and I'm making some necks
Check it out!
The time has come for me to finally build my own electric guitar necks so
without any further ado, let's jump right in and get these things done. So I'm
gonna start this out with some maple that I machined from a slab of maple. To
prepare this piece of wood, I cut it dow,n ran it through my planer and then ran it
through my drum sander to make sure that it's nice and flat and we're right at
three quarters of an inch. There's a couple of defects on this board that I
want to work around. There's a knot right here and also I think this is some
spalting just beginning right here along the edge. I also don't want that in there
although I do like spalting I don't think that it's going to be stable
enough without some sort of stabilization process to make it usable
for this project, but it's nice and solid no spalting no knots all the way up
through here and I think my template is just gonna fit on here perfectly so I'm
just gonna drop my template in place, position it where I can avoid the pieces
that I want to avoid and I'll trace it out
now attach the template to the neck blank using some double-sided tape and
using a template bit in my router I'll route it to the exact shape of the
template
this is not sponsored by Radian Tools but their router bits are really really
nice.The finish that their router bits give is amazing. Now before I remove
the template I'm just gonna drill some small pilot holes
that'll mark the location of the tuners
now I just need to carefully pry these apart now I can move on to the truss rod
now I'm gonna carefully measure the width of the neck and mark out a
centerline
now I'll use some double-sided tape to stick my routing jig to the neck. Then
using a spiral down cutting bit in my router, I'll rout out the truss rod channel
to a depth that's exactly the same as the truss rod.
So now that I've got the truss rod slot routed, I need to cut a recess in
the end that'll accept this barreled portion of the truss rod I'm going to
use this drill bit that's made specifically for drilling this recess
now I can draw a center line on the fret board clamp it in place and using a fret
scale ruler I'll mark out all the positions of the frets then using a
machinist square I'll draw a line across the entire fret board now when I'm
marking these out I want to be very careful that I make a nice square line
across there so to make sure everything's lined up I put my pencil on
the pencil mark slide my square up to it and then make my mark now with my fret
slotting saw in a jig to hold it perfectly square to the fret board I'll
cut all the slots to the proper depth for the fret wire that I'm using
now it's time to install the truss rod and glue the fretboard in place I'm
gonna use a nice solid clamping call so that I get nice even pressure all the
way across the threat board the whole time I'm tightening the clamps I'm
watching my center lines to make sure nothing moves I'll let that glue dry for
a couple of hours then I can come back trim off the excess and route it flush
with a template bit
now using this belt sander I'll remove some thickness from the headstock this
will also help bring in the radius for the transition between the fretboard and
the headstock there's one little spot that's hard to get to that belt sander
but a sanding drum in the drill works really good
now using a special stepped drill bit I'll drill the holes for the tuners
using the pilot holes that I drilled earlier for alignment
and now I can glue in some homemade maple fret markers now using some
adhesive back sandpaper on a radius block I'll begin the process of hand
sanding the radius into the neck it's a fair amount of work to do this by hand
but really if you start off with a heavier grit sandpaper eighty a hundred
it's not that bad just got to go really careful to make
sure you don't go too far because it does go fairly quick
I'm trying something just a little bit different for the side markers on this
neck I'm actually using some bamboo skewers that I've cut down so one last
thing I want to do is cut a little recess where the logo is gonna go to do
that I made up a little jig that holds the neck in place using a template bit
in my router will allow me to cut the recess right where I need it
I worked pretty good I've got all the frets cut ready to press in I have a
front press that I was going to use for this but I don't have the right radius
insert that is one thing that I did not check before starting this I'm using a
radius that I don't have the insert for little brass insert that helps put even
pressure on the frets so we're gonna have to do this old-school style
what do you say let's carve a neck I'm gonna start out with a spokeshave and
remove the majority of the material then I'll switch over to a saw rasp and
refine the shape
I'll finish up with an assortment of rasps and files followed by more sanding
than you could ever imagine well after a lot more sanding than you ever care to
think about we got a finish neck turned out really
good I haven't done the finish on it yet because I'm gonna wait until it actually
has a guitar body to go with but this thing is ready for some finish hardware
decals and a nut but the majority of the work is complete there's still a little
bit of fret work that I need to do I need to level and crown they feel pretty
good they went in really well I'm really happy with the way this thing came
together I think this is gonna look really neat with a nice flame maple it's
gonna come out really good when we get some finish on there so thanks a lot for
watching this video guys I hope you enjoyed it I know a lot of you guys have
been waiting for this video I know I've had a lot of feedback from some of you
guys on me making my own necks well we've finally got it done and I am
excited now I just need to get some bodies made to put these necks on so
thanks a lot for tuning into this video I hope you guys enjoyed it in the video
description you'll find links to my social media pages website my web store
and a bunch of other things you might want to check out thanks a lot for
watching everybody and we'll see you next time
-------------------------------------------
How To Deal With Anxiety - Duration: 4:08.
hi y'all we're back so happy to be back yeah I'm Andrea and this is Juana
hi Juana NOT wanna yeah yeah oh you said thanks for stopping by already I did
stop I said no I said I'm so happy we're back we're back I'm Andrea and I'm Juana
and we're thankful that you're joining us today yes thanks for stopping by
watching today's episode of the weekly wrapup let's mount up
well as you have come back we have some awesome videos for you from around CBN
and we'd love to highlight them for you this week only the best for you my topic
for this week would be a question and answer session your questions honest
answers from the 700 club as you know I've talked about my
struggle with anxiety in previous episodes and the viewer asked this time
how to deal with anxiety and Pat had some really good advice you'll want to
check out that clip here if you want to learn more about how to deal with
anxiety we actually have a really cool new DVD called the i wills of God
featuring dr. Pat Robertson so give this number at all so you can get so you can
get that DVD give this number call and we'll be sure to get that DVD to you
we're just gonna let God take care of it and I think that's really the simple
basic answer to our anxiety and our needs you have a burden give it to God
he's got it now remember when we're at the end of our road of the end of our
rope with all the sickness of the world around us God is the only remedy that we
need so keeping that in mind watch this video over here that we've
got for you on a story of a US Marine who got the healing that he really
needed who got what he really needed which is God hmm so watch it now imagine
Andrea, imagine you had to walk to a distant water well each day to get
clean water with a baby in one arm and a bucket and the other and you had
to make this trip multiple times just to get clean water for your baby to survive
and today and to cook this was the reality for Sonia who lives in an Indian
village and CBN was able to step in to help her so she didn't have to walk so
far to get that clean water you can check out Sonia's story here and a big
thank you to our CBN partners who helped make that possible yep you can find the
link in the description box below if you want to know more about how to become a
partner with us and now here's another neat video you want to watch this right
here the Superbook kids were sent off to Washington DC to the Museum of the Bible
and they got to you know experience things like the food of the Bible and
just like the times back then just learn a little bit more about things that they
probably wouldn't know and there's a couple of more videos so you want to
watch that our final video for today is an important one human trafficking is a
problem that happens all around the world both in the US and in other
countries so it's important to shed light on it and to learn signs of how to
recognize it so that we can combat it and that's exactly what orphans promise
is doing in Vietnam now so click this video so you can see how the orphans
promise team is combating human trafficking and it's awesome to see that
well guys that's all that we have for today
we are so glad you joined us this Saturday and we hope we see you next
time so like subscribe share comment do everything we love you guys and we'll
see you next week super genius
-------------------------------------------
How To Get Free PSN Codes - Free PS4 Codes - Free Playstation Plus **NEW UPDATE** - Duration: 4:25.
How To Get Free PSN Codes - Free PS4 Codes - Free Playstation Plus **NEW UPDATE**
-------------------------------------------
how to get rid of oily skin and whiteheads - Duration: 6:14.
Did anyone ever told you about how to use coconut oil and lemon for grey hair?
Are people telling you that gray hair is caused by aging and that you are old?
Sit still, stay tuned and watch this YouTube video to the end for real answers.
Welcome once again with Injibs Cosmets and hoping that you stay tuned to my beauty tips
today.
If you are new to this channel, In order to gain access to these mind blowing beauty tips,
smash the subscribe button below and hit the bell button to receive a notification of every
awesome video that I upload.
Today I will teach you How To Use Coconut Oil And Lemon For Grey Hair with simple steps
that can easily be applied in your comfort zone.
My diy gray hair tips of the coconut oil and lemon juice for hair are very clear and are
tips that will guide you into how to use coconut oil and lemon juice for grey hair.
These home remedies for grey hair include coconut oil and lemon juice for white hair
and if you have been looking for something to cure the problem, this is a permanent solution
for grey hair.
Google and YouTube has plenty of videos and articles concerning how to use coconut oil
and lemon juice for white hair and if you are desperate for it, then go ahead and discover
these awesome tips of how to use coconut oil and lemon for hair.
Going grey is a natural part of life, as the color of your hair comes from melanin.
Each strand may contain light melanin and dark melanin, which come together, forming
the many different hues of hair color.
When you're young, special pigment stem cells called melanocytes inject pigment into keratin-containing
cells.
This keratin, a protein, makes up your hair and is responsible for giving it its color.
As you age, there is a decrease in melanin, which is why your hair turns gray and, ultimately,
white, which means there is no melanin left at all.
In addition to age, there are other factors that play a part in going gray, including
genetics, obesity, environment, and stress.
Researchers have also found a significant association between tobacco use and gray hair.
Smoking cigarettes have been linked to premature graying, including the onset of gray hair
before the age of 30.
Oxidative stress, which comes from an unhealthy diet, pollution and stress, has a role in
graying hair too research has also shown that those with premature graying had a higher
level of pro-oxidants and lower levels of antioxidants than those with normal hair.
A vitamin B12 deficiency has been associated with prematurely grey hair in fact, there
have been some reports of hair returning it its original color after resolving the problem.
Premature hair graying is one such problem that is been faced my many teens nowadays.
Many factors including unhealthy lifestyle, chemical dyes, shampoo and environmental pollution
sum up to cause premature grey hairs. using nature home made nature hair oils using Curry
leaves, Fenugreek seeds, Aloe Vera and Indian gooseberry will reduce and prevent grey hair.
Using Natural ways like Home remedies and herbal hair masks, once can reverse grey hair
to their natural hair color.
Coconut oil and Lemon for grey hair is one such home remedy that is been on hype in Pintrest
and Youtube these days.
Read on to know how this works
Now, Mix 1 tablespoon of Fresh lemon juice into it.
Apply this Coconut oil and lemon mixture all over your hair from roots to tips.
Massage for 5 minutes until the mask is well distributed to your scalp and hair.
Tie your hair into a bun and let the mask soak for a minimum of 2 hours.
Note: As Lemon is highly concentrated citric solution, do not move out in the sun after
applying this mask on your scalp.
This may cause sensitiveness.
Wash your hair with a mild herbal shampoo after 2 hours and condition as usual.
Coconut oil and Lemon are a great combination that reverses grey hair.
coconut oil contains Lauric acid and antioxidants that promotes healthy hair growth and also
provides abundant proteins for your hair.
On the other hand, Lemon juice contains Phosphorous, vitamin B and C which helps to rejuvenate
scalp and promote hair growth by encourages the melanin production which is responsible
for your natural hair color.
The combination of these two ingredients will help reverse the growth of grey hair and promotes
natural healthy hair with regular use.
Use this hair mask of coconut oil and lemon for grey hair reversing twice every week.
I hope you found this information about how to use coconut oil and lemon for grey hair
quite useful.
stay tuned for more awesome tips.
Do not forget to subscribe at the bottom of this video.
Smash the LIKE button if you like this video.
What is your opinion regarding this topic?
Comment bellow for discussion.
Injibs Cosmets once again and I hope that you stay tuned to my beauty tips today.
-------------------------------------------
How to get your summer body ready with just one treatment |CoolSculpting SLC + Lehi, UT - Duration: 3:31. For more infomation >> How to get your summer body ready with just one treatment |CoolSculpting SLC + Lehi, UT - Duration: 3:31.
 -------------------------------------------
How to take down Christmas lights...the wrong way - Duration: 1:06.
Ho Ho Ho
Ho Ho Ho Merry Christmas
This right here...this right here.
That's why you check kids work when you put Christmas lights up at the end of the year.
What could have taken...20 minutes
To spool these up. Will now take me hours.
Merry Christmas
Check your kids work. Do yourself that favor.
This sucks. I'm just saying, this sucks.
That's just stupid.
This gonna be fun.
-------------------------------------------
How I Turned $2.67 Into Making $104,000 A Year On YouTube. - Duration: 9:16.
How I Turned $2.67 Into Making $104,000 A Year On YouTube.
-------------------------------------------
How neurons work ? in telugu #నాడీ వ్యవస్థలో సమాచార ప్రసారం | General science biology in telugu - Duration: 4:34.
science and technology
general studies
english grammar
maths techniques
please subscribe and press the bell icon for latest updates
How neurons work in telugu
-------------------------------------------
Comment s'orienter avec Suunto sur le terrain - Duration: 11:22.
Today, we will explore together how I use the Suunto Ambit watch,
on field at Mt. Sutton.
Hi! I'm Pascal,
and welcome to this 15th training capsule, to help you on your next trip.
Last week we saw how to configure in depth the Suunto Ambit watch, to
get every pertinent information we want to have on the screen.
If you have not seen it yet, I recommend you to look at it before, by clicking right here.
I use the Suunto Ambit watch since many years, and I learned
some stuff by doing this training capsule.
This week, Simon has joined the adventure.
Not the Simon I met during the last trip to northern Europe.
the Simon who is a close friend since my childhood and that made me discover this
passion for the mountains.
Sutton is the mountain on which I t in shape.
A few years ago, we came to climb it at least once a week, faster each time.
This mountain is beautiful at all times, but especially in winter.
I will then make you discover it at the same time.
But let's all talk about the watch first.
Once arrive, I put on my spiked shoes, and my winter clothes,
I start my watch before doing first steps.
First, I click on the start / stop button to access the menu.
I enter the exercise section and then in my case, Hicking.
As I had asked for this activity, the watch search my heart belt, it's waiting to find it.
But I did not bring it with me so I click on '' later '' to forget it for the moment.
By the way, if you have difficulty to connect your belt at the beginning of an activity,
it's either the batteries are dead or that it's not wet enough.
These are the two bands on the other side that capture the heartbeat.
And during an activity it's your sweat that stimulate it.
To help it at first, I put a little bit of saliva on my fingers and I reapply it on the strips.
Generally, it usually connects fast enough.
Then the watch will look for the sattelites.
Try to be in the environment the most open to the sky around you and do not obstruct
the black part below your watch.
This is where the GPS is.
I already saw someone who was having trouble to connect to the GPS each time before
an activity, because she held her watch like that.
The thumb on the GPS ...
It's very bad to find satellites.
And I'm sure she recognizes herself!
Once everything is found, we can start the activity by pressing '' start ''.
Then, when I go for a walk in the wood, I often activate the navigation mode.
For that, I hold the Next button, I enter in navigation.
I unfortunately did not think to do it on the spot, but if ever you are lost
somewhere and you want to call emergencies, it's in location, then current right here
that you will be able to share your geolocation.
Once in the option, you can also save the point.
But what I wanted to do at that moment, it is to point the summit
Last week I recorded the top of the mountain in the watch.
I can then find it in POIs, for point of interests.
The logos I was talking about last week are visible right here.
Flags are goals, and for Sutton, as we can see is the little logo of a mountain.
Then I select Sutton, then navigate.
The watch then tells me precisely the distance to which I am from the top, and
also tells me approximately in wich direction to go.
Yes, approximately.
Let's go on the trails, we'll see why a little later.
We are now approaching the summit, the watch tells me that we are 611 meters from
the objective and the arrow tells me that it is straight ahead while pointing with the red line.
But it's only an approximation, because when we stand on place, the
watch uses the compass for the direction.
To have more precise information, you just have to start walking until
you see two lines appear in top of the watch.
Like that!
At this moment, the watch calculates the the latest GPS points to determine which direction you are walking.
So again, the top is at 608 meters from me, and I should orient myself 85
degrees to the right to go the most directly possible.
But there are trails on this mountain so I will continue to use them.
Here we are at the top.
If the watch shows me another 144 meters, it is because that mountain have two peaks and
that I did not point the right one on the map.
In my opinion, this one is the right one, because it is slightly higher than the other one.
So it's 12:28, I'm at 972 meter in altitude and I climbed 456m.
We left since 1h22, descended 6 meters, and I did not put on my heart belt,
so no info on the heart beat.
On the other page, we see that we have traveled 3.26km at an average speed of 2.4km / h.
But we will now go down by another path so I would like to know in
which direction is the car to be sure to stay on course.
So I enter in the menu as at the beginning by holding the '' next '' button.
If the screen reacts strangely like that it's only because it was about
-15 Celsius degrees and that the screen was very cold.
Then we go back to navigation and we select the find back option.
This option points to the first geolocation point recorded during the activity.
I now know that the car is at 1.87km in straight line, about 90 degrees to the left.
If, however, I were lost in the wood, and that I could not find my tracks.
This is the trackback option which could interest me the most.
I go back to the same menu, Navigation.
I can not access it at the moment, because '' find back '' is already activated.
I must then do '' end navigation '' for make it appear.
Here it is, the trackback option is now available.
The watch calculates all the way since the beginning of the activity.
Here.
The watch displays the entire route using the black line, and we are at the small black arrow.
But a 3km and a quarter trip on a a few centimeters screen is far to be evident to watch.
That's why you can press view, to enlarge the map on a smaller scale
and see the trail used.
In this mode, we are the arrow in the center and the plan moves while turning.
The watch will even emit an audible signal to warn us if we leave the trail.
That's it, it's all over for today, as we saw last week how
setting the watch in deep, I believe that the essential thing that remained to be observed today,
was the navigation menu to well orient yourself, and even perhaps to get out of trouble.
Personally, the trackback option saved me life twice.
The first time I went off a trail without realizing it and when I realized it, I was already far enough that ...
I was not able to retrace my steps.
The second time, we were at the top of a mountain, in a snowstorm, and we
could not even see more than five meters in front of us.
It was windy so much that our trace in the snow was erased within a minute.
Okay, we would not have been venturing on the top without tools to be able to
to find our way back, but it still allowed us to bring back someone who was turning in
round for a while in safety on the trail in the woods.
So I leave you on other beautiful pictures of Sutton, and see you next week,
with a documentary on Gaspésie.
Do not miss that!
Salut!
Thank you very much for watching this video.
I hope you enjoyed, if so, you can give me a thumbs up.
If it's not already done, join me by subscribing to my channel.
You can make the button appear by clicking on my face just below.
And do not forget to hit that little bell next by.
That way you'll be notified to each of my new publications.
You can also visit me directly on my website.
pascalmarquis.com
For even more content, subscribe to my personal email list.
The link is available in the description.
Waiting for my next publication, there is some other videos that you may not have seen yet.
Enjoy!
Salut!
-------------------------------------------
How to Clean Copper Vessel ? | Simple Trick | Just Dip and Clean - Duration: 3:32.
How to Clean Copper Vessel ? | Just Dip and Clean
Không có nhận xét nào:
Đăng nhận xét