Thứ Bảy, 30 tháng 9, 2017

Youtube daily how Sep 30 2017

Big CrazyJohn here with Big Crazy Outdoor Adventures my friend Andy who you may have

seen in a previous video.

Big Crazy John's Outdoor Adventures Woohoo!

My friend Andy gave me this Fresnel Lens that he bought on Amazon.

I'll have a link to it in the notes.

So you probably can't see it but I'm trying not to reflect it into the lens but basically

there is a series of concentric circles that make up this lens.

It's flat so its not your typical magnifying lens that has a convex type lens.

So I have been wanting to share this with the channel for a bit.

I think it's an interesting tool to use to start fires as well as to burn wood.

Which I will try to show later.

First I just want to start a fire with it here.

I have a piece of Jute Twine I'm going to pull apart a bit, and frazzle.

We have a pile of leaves in this tin.

We have the sun to our back.

So we are going to give this a go.

So the Jute Twine is nice because lots of purposes 1) being its twine 2) being its a

good fire starter.

It has a lot of fibers that can catch.

They have a lot of these pocket Fresnel lenses and that would be good to throw in your back

pack.

This large 8" x 10" Fresnel lens is not ideal to take with you.

This size is actually meant as a magnifying glass its 300% magnifier for a whole page

in a book.

I don't have one of the pocket ones yet and pending on how this goes we will be getting

that and trying that out as well.

So now its very thin hair like kind of substance here, which is great for catching sparks and

catching on fire.

Trying not to catch it on fire.

It works very well.

Oh wow that works really well.

You can see the smoke.

It's catching.

There it goes that was easy.

That's how you use the Fresnel Lens.

Say Hi to the camera.

Say hi.

Right there.

Say hi to the camera.

Look at that your in shot.

Having some challenges getting the right angle here.

There we go right there.

Trying to get that pin dot.

Trying to get the right focal length.

There it goes.

Remember get outside and have some fun!

For more infomation >> How to Campfire - Start a Fire with a Big Fresnel Lens - Great Tool for Backpacking and Camping 🔥 - Duration: 5:02.

-------------------------------------------

How CliftonStrengths Development Helps People Improve Careers - Duration: 5:30.

HOW CLIFTONSTRENGTHS DEVELOPMENT HELPS PEOPLE IMPROVE CAREERS

[Jenn McCloskey, Director] Professionally, it literally changed the course of my career. In my previous role, my manager and I were butting heads, my

performance reviews were not glowing, I was constantly

frustrated, being told to kind of sit in the corner and don't challenge the status quo and why can't you just sit there and get your work done? And the company that I worked with

decided to embrace Strengths across the organization, so they put everybody through it. I took the StrengthsFinder assessment for the first time and my Top Five just, they

nailed it. And it was like oh, well, this is why I'm so frustrated. I was in a role where progress was slow in coming and, you know, being an Activator, I want to get things done.

Achiever, I want to get things done. So it was literally I'm like I'm in the wrong role. And I even said to my boss, I'm like I'm never going to be successful here, this isn't ever going to be

anywhere where I'm happy. And it was the only time that I ever posted for another position.

He wanted somebody, very specifically, to balance him out and be, you know, the yang to his yen. And we worked together for three and a half years. We built a team that was

based on Strengths to support and complement the center leaders. So we had four centers across the country, very different leadership styles, very different cultures, so we

leveraged Strengths to identify people that would work well with those individuals and that just, it was probably the best, the best team experience I've ever had, the best management

experience I've ever had, the most fun I've ever had at work, because I was clicking on all cylinders.

So that literally changed the course of my career. And I've embraced it ever since.

It's how I was raised to be a manager and it's, I've, I've done it ever since.

[Candace Osunsade, Senior Vice President, Chief Administrative Officer] For various points in my career I would describe who I am.

And my language was around the work that I did for an organization. StrengthsFinder opened up my understanding

of the connection between my purpose and who I am and the Strengths that I have been given, my super

powers, to really understand that it's not work that I do, it is really my fulfillment of purpose.

[Cherene Douglas,Organizational Effectiveness and Development Specialist] I realize I'm decent at what I do, but I actually can get even

better. Now that my Strengths have been revealed, it makes sense.

[Conrad Davies, Faculty Lecturer] So it really just changed my practice. The better way I can say it – it conceptualized how I'm wired. And, in fact, it took

me to another level to say I can be bold in how I'm wired. And that really is what the assessment did for me.

[Jessica Huggenvik, Senior Vice President, Human Resources] You go through these types of assessments, and there's a lot

of them out there, and as an HR professional, I've been through a lot of them, so when I was working for an

organization that had me do my Strengths in the first month of my employment, I was like eh, okay. And then I went to this two day course on Strengths and it just made complete

sense to me. My, the things that I struggled with personally, like why do I do that, why do I react that way, why do I struggle in that arena, started to come together for me. And

it helped me be more self-aware and helped me learn how to manage my teams based on their Strengths and the things that they're strong at, right? Or their talents so it's affected

me at work in everything I do and I think sometimes people feel like I'm sort of beating a drum about Strengths, but it's so important.

[Vicki Tkachuck, Director, Leadership Development, Patient Experience and Volunteer Services] The neat thing about my Strengths is that I've actually been

able to use my Strengths to even create my position. It was a position that didn't exist before I came and so I've been able

to customize it and tailor it to fit my Strengths, which has been great. And so I can use my Strategic in working with the executive team as we're building a culture. And also,

then, as I'm working with leaders and doing coaching with them, I find that my Individualization has been really helpful

because it helps me better understand what their journey is and appreciate that.

[Anne Murray, Senior Director, Marketing Communications] You may have gotten to this point in your career, whether you're just starting out or whether you've got 25 years, you

know, behind you, if you can begin the business of

understanding why you're here and only you can bring what you bring forward, there's a confidence in that that I think really appeals to people. You know, previously it was,

you know, we really need you to work on this. Now it's a conversation on what is it that's holding you back? You know, what can we lean into so you can gain understanding?

Maybe they're not in the right seat on the bus. Maybe this isn't the best use of what they bring to the table. But even reframing some conversations.

[Maureen Rabotin, Executive Coach] So when I look at a challenge today, I can look at it from a Strengths perspective and say wait a minute, which of my

Strengths can I leverage to manage this what we call volatile, uncertain world that we live in today. And when you know your Strengths, you can feel a sense of relief and know

where to go to leverage and to better manage whatever challenge comes your way.

[Tony Aitken, Organizational Development Manager] So, look, on an individual basis, I've seen people make decisions about being in the wrong career direction and have

changed direction within the business and really flourished

and often had struggled for several years, thinking something was wrong with them. And when they found the right job that matched their Strengths, they've taken off.

Learn more at cliftonstrengths.gallup.com

For more infomation >> How CliftonStrengths Development Helps People Improve Careers - Duration: 5:30.

-------------------------------------------

FENTY Beauty Match Stix TRIO in LIGHT Shade & How to USE Fenty Match Sticks - Duration: 8:26.

I think...

I think...

I got these Match Stix to work for me!

*Intro Music for AEHM artistry*

What up guys?!

Ashley Elizabeth here with AEHM artistry.

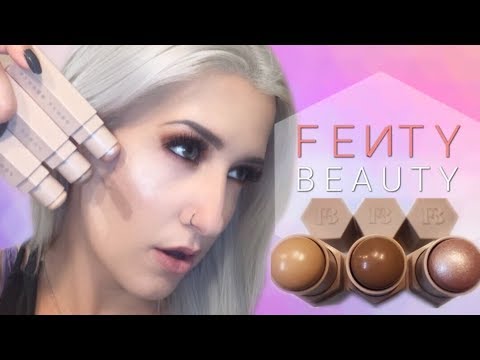
Today I'm going to show you how I got this

Matchstix trio in the shade Light to work for me.

If you watch my Instagram stories or snapchat

then you know that I have had quite the battle with these

Fenta Beauty matchsticks.

Basically what I cannot do, is I cannot just swipe them

on and blend because you know what?

They blend to nothing!

And that is with a brush or with a Beauty Blender.

I can't, I can't swipe it right on.

And I was thinking that contour shade, which is called Amber, felt like it was too light of a

color. It wasn't dark enough...

And then the shade Linen, which is the highlight &

concealer stick, felt like it was not light ENOUGH.

So, it was a weird balance.

The Starstruck highlighter, with the shimmer in it, was kind of separating on my

pores. You can't put it directly on the foundation or else it will just mush it

around. It is terrible, yuck!

And I tried it with several different foundations.

I probably tried it about three or four times. And yesterday I think I found the

golden ticket because this makeup ain't gonna beat me no, no, no!

Maybe if you have it, and you're struggling with it, you can get it to work for you too.

I really feel like this is a light natural contour.

That is great for those "girls [& boys] on the go",

for moms on the go, that don't have a lot of time to blend and blend

and brush and brush because this technique will get it done lickety-split.

First I prep my skin properly starting with my moisturizers

and then I go in with the primer that they make. It's really really nice.

And then I go with their foundation.

What I love about that, even though I have dry skin, is I don't

have to set it with powder.

So I put this foundation on just a few minutes ago and

it's already dried down and it doesn't move and it doesn't shift.

If I add powder on top of it, it is SuperDuper matte. It's too much for

my dry skin. So, if you have dry skin,

just know those tips. Moisturize ahead of time,

I love their primer and the foundation, don't touch it with

powder after just let it sit, except a little bit of contour powder if you want.

Now, right over the foundations done, I go in with my matchsticks. Like I said at

the beginning, do not swipe it straight on because I find that...number one, it

does drag the product no matter what foundation I use underneath and number

two, it blends out to nothing. And it's like nothing's even there and it's just

like what the heck?

So what I do, is I use my Beauty Blender

and I swipe it right on just one side.

And then I go into the hollows of my

cheeks and I just start blending it out.

And the color payoff is so much better this way.

Than the other way, you would think.

I totally thought this would be a good swipe on stick and blend out and I could

just go on with my day, but no.

That proved to be fatal.

And you could just

build up the color or you can do a very light.

And I actually learned this, I need

to find the comment that I found, I was watching somebody's [first impression video]

and some commenter said "you know you're supposed to apply that with the foundation brush right?".

Like, straightaway and then swipe it on.

Like, put the fountain, put it on the

foundation brush and then swipe it on.

And then I thought, "you know it would be

even better my Beauty Blender!". And so I ran upstairs, no joke, and I went and I

tried this

And I was like "yes, finally!"

So I need to find that commenter and thank them!

Because I was about ready to run to Sephora and return this because I was so

mad at it! Like, I was so mad.

Which is ridiculous. But if you watch my snaps you

know I tried it to so many different ways. So many different ways, guys.

And this is so much nicer.

Just warm up the face.

And then it's not separating my

foundation or anything like what was happening before.

And I'm just tapping the product on.

Now I will say, there is one way that I do like swiping this on...

and I actually like swiping on for the nose contour. Because it blends out to

nothing. It's not so harsh.

See it like it blends out too like

almost nothing. That's why I like applying it to a sponge, but like I said

for the cream contour for the nose, I like it blending out to almost nothing.

Because I just want it to a hint.

I just listened to somebody that said

"contouring the nose too heavy is like somebody with a bad toupee".

Which its like, you ain't fooling anybody, we all know! But you know what?

I like a little contour on the nose but I want to keep it very minimal, for sure.

Alright, so that was the Amber stick in the matchstix trio.

Now for the highlight type of shade

that's more of a highlight / concealer.

Ifound adds very light coverage.

It doesn't really conceal all that much.

So let's just use it as kind of like a highlighter.

I'm using a new Beauty Blender, so I don't mix the contour shade

in there. If you don't have the luxury of having 14 million Beauty blenders like I

do, then just use the other side of the beauty blender from the beginning.

And make sure your Beauty blenders are damp, of course.

Cut that the line a little bit further.

If you want to blend it. You can blend the two together, if you want a

more soft look.

You can definitely cater it to the look

that you are going for.

And then I very, very lightly put it under the eyes.

If I do too much it will 100% crease in my fine lines.

I noticed it's really good for

cutting that shadow line.

Then I flip the Beauty Blender around, just

make sure to the two really melt together.

And that's with the matchstick trio

shade in Linen from the light set.

Alright, and the last step that we're gonna

go in with is the Starstruck highlight stick.

This one I notice I can either

warm it with my finger and very, very gently Pat it or I can go in with my

little Beauty Blender, that is the concealing one, or again you can go with

your regular Beauty Blender if you have a clean side. Or just use your finger.

But again, take it right off the product and then just very, very lightly

tap it right on.

And it's very subtle, so this isn't for that, like, super blinding highlight.

But on a day that I want to be more natural,

"natural"...

this is nice.

I'll do the finger way on the other side.

A little more concentrated but with the finger

you have to make sure you're not moving the product around too much.

Alright, that is with the matchstick trio Starstruck shade

in the Light set.

You guys can see up close a little bit.

Now overall, is

this something that you absolutely need to have in your makeup stash?

I'm not still a hundred percent like, yeah totally.

What I really like this for:

is somebody that's on the go, that wants something done really quick and

still give a little bit more polished look and some definition. Who doesn't

have time to completely blend and blend and blend. Just do not go in with it just

straight on. But if it works, and if it does that well for you, that's awesome.

Tell me what foundation you paired with it because it didn't work for me.

But I really liked it this Beautyblender way.

Let me know in the comments below

if you feel like trying this.

There are some other highlight sticks out there that

got me sailing!

Like the [Fenty Beauty] Confetti, I think would just be awesome!

And you know what

I love most about these is? They're magnetic and I can add a million!

Alright, thank you guys so much for watching!

I hope this information helped

you decide if you want to get the Fenty Beauty Matchstix trio, and this

particular one was in this shade Light.

And if you already have it, let me know

if you try this and if this is what works better for you, if you're having

challenges.

I kind of felt like I was a little bit alone and like everybody was

neutral.

I didn't feel like anybody was raving about it, but I didn't feel like

anybody was saying that it wasn't good.

And I was like....

this is not good, what the ...

Know what? I made it work and I love it now and it's great for those days that

I'm on the go.

Before you guys fall down the rabbit hole which is YouTube

Make sure you hit that SUBSCRIBE button, please!

Every view, share, like and subscriber helps!

Don't forget to find me on social media.

I think my absolute favorite has been Twitter, but I am starting to do

Instagram live stories. So if you want more content go visit me there.

Alright, you guys have a great lovely day! XOXO

For more infomation >> FENTY Beauty Match Stix TRIO in LIGHT Shade & How to USE Fenty Match Sticks - Duration: 8:26.

-------------------------------------------

How Gallup Coaches Can Help You Succeed Using CliftonStrengths - Duration: 5:00.

How Gallup Coaches Can Help You Succeed Using CliftonStrengths

[Jacque Merritt, Senior Workplace Consultant, Gallup] What I love is watching people transform over time. So it's interesting, when people get

into coaching, they almost feel that it's a selfish decision.

[Sue Bath, Senior Workplace Consultant, Gallup] I think people have to have coaches in their lives to create excellence.

[Rachel Maglinger, Senior Workplace Consultant, Gallup] So you've gotten this amazing assessment, but it doesn't stop there. You have

to be able to look at that and think about practical application. And sometimes that's hard to do as an individual, because you're still kind of learning

about what Strengths is all about. And I think what a great coach does is help those things come alive for you and really helping you think

about what are things that keep you up at night? What are things that you struggle with? When do you think your Strengths get in the way? How do

your Strengths get more optimized?

[Mike Kinney, Senior Workplace Consultant, Gallup] I help people sort through the challenges that they're facing, think through what's really

causing it as well as what are their goals that they have and what do they want to do. So I get them to think about it and then I provide them a

perspective based on who they are. So it's really thinking about who they are and how they do things naturally anyway. And sometimes their

eyes are just open of yeah, I do that. And they don't even realize that they're doing that all the time. And you just provide a perspective from

outside of the person that they start to see, okay, I've got this in me, I know I can do it, and now I've got some real specific ways of how I can. They

get an opportunity to do something that is already within them and we're just helping them to really highlight it and think about what they do.

[Nancy Oberst, Workplace Consultant, Gallup]We're always asking people to take some action. To do something. To take the first step.

[Cathy DeWeese, Senior Workplace Consultant, Gallup] We talk about goals. We talk about workplace challenges. And, through the

conversation and through some of the questions, they really, it gives them an opportunity to come up with some strategies to try. So now they

move from a space of being stuck to a space of oh, I've got some strategies. I've got a place, I've got some ideas, I've got some suggestions of

things to try, so I can go from this reality into this aspiration.

[Ryan Feagan, Senior Workplace Consultant, Gallup]I think the coaching that I provide to individuals and teams gives individuals, I think,

permission to really be themselves and have their own, perhaps their own style, their own method, their own ways of achieving particular things. I

believe it empowers them to deploy themselves in the best possible fashion. And I think it also gives them a sense of confidence in how they might

embrace a particular challenge or embrace a particular difficulty and be, well, more intentional in how they can, you know, get stuff done and

be more effective.

They're happier. And, because they're happier, they're more productive. Their quality increases. Their relationships increase. They want to just

be happier, healthier, more productive. It creates that ripple effect of wellbeing in their life. Everything gets better for them.

They quickly discover it's not just for them; that it really spills over into every aspect of their life. So they become better parents, better spouses,

better partners, better colleagues, better leaders, better managers. Watching them kind of step up into their responsibilities with more strength and

more confidence, more power, I think that's what I love about coaching.

You saved my job. You saved my family. No one's ever asked me that before. I've never thought about that before. Thank you for being

honest. Thank you for being direct. I know I'm a better leader. I know I'm a better manager. I know I treat people differently. I know I get better

results.

[Therese Nisbet, Senior Workplace Consultant, Gallup] The reality is when we know who we are, we are just going to be better at what we

do. So when we understand the dynamics of how we get things done or how we foster relationships or how we think, there's just

something magic when we understand who we are. Because it translates, then, into what we do every day. So having those conversations with

people, helping them think through really and truly what it is about them that gives them energy and fulfillment and having them put that into some sort

of practice as they think about what they do every day, that's a fun job.

Learn more at cliftonstrengths.gallup.com

For more infomation >> How Gallup Coaches Can Help You Succeed Using CliftonStrengths - Duration: 5:00.

-------------------------------------------

Learn How To Do Side Roll(Parkour Roll, Safety Roll) in Just 60 Seconds + Tips| Ninjastic Parkour - Duration: 2:59.

YouTube subtitles are available

Hey guys Meet Vij here from Ninjastic Parkour So today I will teach you how to do a safety

roll in just 60 seconds with my friend Arjun

Ohh you might be thinking that ah this man is crazy how can we learn it in just 60 seconds

No, what I'll do is I will teach you the technique in 60 Seconds but you will have to practice it

for a very long time

And yes I watch many tutorials on YouTube and then give you the best technique possible

Step 1 Your hand should be in this position so if

you want to roll on your right side your right hand will be tilted like this and if you want

to roll on your left side then left hand would be tilted like this

Step 2 Touch the elbow of the tilted hand as shown here

Step 3 Take your head aside as when you roll on your

shoulder your head will come in between so it is obvious to take it aside

Step 4 Roll diagonally that is you will start your

roll on the right shoulder and end somewhere Over here on the left side and if you are

rolling on the left side vice versa

Step 5 Push with your legs when your body is at this

angle if you push early then you might fall on your back which is not good and if you

push very late you will fall on your shoulders which is also not good

as it may lead to injuries like breakage of shoulder bones which is very painful

You must take care where you have to land so this your back of the shoulder is where

you have to land which is here but not on your back to listen carefully not on your

back which is over here

Tips Time Always take care that your legs are not crossed

like this if you keep them like this then you may lose your balance and fall so please

keep them like this

Learn this role on a soft ground like grass or mat a padding etc. so after you are comfortable

you may try it on a concrete or any hard ground

Rolling after jumping from a high place take care that your body is leaning forward otherwise

it won't be of any use

If you are not able to do it or struggling somewhere just reach me at ninjasticparkour@gmail.com

It would be better if you learn how to land in Parkour first and we already have uploaded

its tutorial

Check it out by clicking here

The winners of the giveaway is Pratik Visapara and Mitesh Guna

Congratulations

And if you want to claim your prize then just contact us at ninjasticparkour@gmail.com

I'm now stopping to give away prizes as I didn't receive any good response from people

watching this videos

I hope It helped you and see you on next Saturday when I teach you how to do a Kip-up

So don't forget to subscribe for more small and efficient tutorials like this

For more infomation >> Learn How To Do Side Roll(Parkour Roll, Safety Roll) in Just 60 Seconds + Tips| Ninjastic Parkour - Duration: 2:59.

-------------------------------------------

#IVLOG2017 I will show you a video about how to make KETUPAT - Duration: 4:11.

For more infomation >> #IVLOG2017 I will show you a video about how to make KETUPAT - Duration: 4:11.

-------------------------------------------

How To Make An Electric 360° Table Fan - Easy DIY - Duration: 4:34.

Welcome

please SUBSCRIBE

For more infomation >> How To Make An Electric 360° Table Fan - Easy DIY - Duration: 4:34.

-------------------------------------------

Learn how to use Microsoft Intune with the new admin console and Microsoft Graph API - Duration: 1:09:17.

For more infomation >> Learn how to use Microsoft Intune with the new admin console and Microsoft Graph API - Duration: 1:09:17.

-------------------------------------------

How to Handle a Boa - Duration: 2:15.

Hey there! What I've got for you today is a young, a two year old, female common boa

often known as BCI's. Sometimes called Colombian Boas and I don't think you

have any guarantee that your boa comes purely from Colombian ancestry. Anyway I

wanted to show you what it's like interacting with a young boa. And boas, I

love them. They're one of the best creatures you could ever interact with.

They are so inquisitive - they like to explore and cruise around. It's very

different than handling most ball pythons. Most ball pythons are more

content to just sit still - at least for a while.

Sometimes they'll just kind of form a ball, you can stick them on your neck

they'll stay there for a while. They're much calmer and generally - there

are exceptions - but generally less inclined to explore. But a boa, like this one,

they are just really fun. I enjoy them as adults. They'll almost give you just a

big snake hug. And yet, as juveniles, and you can still see they're fairly

arboreal snake and so they will hold on to you really well. You just become their

little tree. I love them, I'm always careful when

I'm around other people and handling a boa. I'm always careful to control their

head. A lot of times, even though they're not feeling defensive not being

aggressive at all, they can kind of have their neck kind of poised as though

they're ready to strike. And that makes it a little more difficult for me to

tell if they are feeling defensive. And so I will control them up near the head.

But you can see I'm never ever grabbing her I'm just supporting her body and

having a wonderful time.

It's been wonderful being with you. As always: like and subscribe. And we hope to

see you real soon.

For more infomation >> How to Handle a Boa - Duration: 2:15.

-------------------------------------------

Teal Swan Jak být sami sebou - How To Be Authentic - Duration: 17:11.

For more infomation >> Teal Swan Jak být sami sebou - How To Be Authentic - Duration: 17:11.

-------------------------------------------

How to make a bunny hop for beginner - Duration: 3:41.

Sorry about my voise at the binging

For more infomation >> How to make a bunny hop for beginner - Duration: 3:41.

-------------------------------------------

How to get VULTURE'S MASK on Roblox - Duration: 0:44.

A4UFUU: TO GET VULTRE' S MASK, YOU NEED TO GO TO THE LINK DESCRIPTION AND REDEEM A CODE

THE CODE IS ''spidermanonroblox''

but i redeem the code 2 min ago

A4UFUU: THX FOR WATCHING GUYS AND SUB TO

CHRISTINA BUZDUG AND PIG BOY ON YOUTUBE

For more infomation >> How to get VULTURE'S MASK on Roblox - Duration: 0:44.

-------------------------------------------

How To Say Thank You In Cantonese - Cantonese For Beginners - Duration: 1:58.

hi this is Cindy from MeiStores.com in this video I'm going to teach you how to

say thank you in Cantonese and how to write it and be sure to watch till the

end to get a free practice sheet for this lesson now let's get started

da Dada da Dada da yeah and that's how you say it next I'm gonna show you how

to write it in the order of the strokes

door there they thick team thank you for your money

and that's how you use it in a sentence now you know how to say thank you in

Cantonese but did you remember the shocks of writing it not a problem I

have a free practice sheet for you click the link in the description and download

it now if you liked this video hit the like button below share with your

friends and be sure to subscribe thanks for watching and I will see you in the

next video

For more infomation >> How To Say Thank You In Cantonese - Cantonese For Beginners - Duration: 1:58.

-------------------------------------------

How to draw Pokemon (Arcanine) - Duration: 5:55.

Today I will be drawing Arcanine

Thanks for tuning in to my latest how to draw Pokemon video

As you can see I am using a slightly different pen for this drawing

I went for a thinner pen that would give me more control around certain parts of the drawing

Starting with the eyes again

Arcanine evolves from a Pokemon called Growlithe

Here you can see the fur and mane taking shape

Le t me know if you would like me to draw your favourite character

It doesn't have to be a Pokemon

If you enjoyed this video then please hit the subscribe button

For more infomation >> How to draw Pokemon (Arcanine) - Duration: 5:55.

-------------------------------------------

How to Make Your Wedding Unique - Duration: 2:25.

Your wedding day should be a unique expression of your love story

So how do you avoid falling into a sea of the same thing and make something that's uniquely yours

Stay tuned for my tip on how to make your wedding day different from all the rest

So are you ready for my tip on how to make your wedding day unique different and most importantly fun

So here it is

I want you to pick one wedding tradition that you are not

Totally in love with and I want you to replace it with something that's uniquely yours something that you probably don't see it weddings

But something that you would love to include on your wedding day

See for example if you don't like cake I don't know why people don't like cake

But there's people out there that don't like cake put in a dessert that you actually love do you love pie

How about a fun pie bar?

there's no rules to this you can take out any wedding tradition that you like and

Insert something else that's unique to you and your fiance and something that is meaningful and special to you

I guarantee on your wedding day that people will be blown away by something. That's totally unique and fun

All right

I know what you're thinking you might be a little nervous about

Ditching one of these wedding traditions or maybe there's a family member or friend

That is kind of pushing these wedding traditions on you telling you that you can't change this you can't do it that way

Guess what there are no rules when it comes to your wedding day?

You can change whatever you like and I think you might be pleasantly surprised at people's

Reactions to the different traditions you trying to put into your wedding day

weddings today are more unique than ever before and now's a great time to introduce something new and fun and

Something that is going to be uniquely yours

So tell me in the comments below what wedding traditions are you getting ready to ditch?

Thank you so much for taking the time to watch this video today. Don't forget

I upload new videos every single Friday here on YouTube

So don't forget to hit the subscribe button and stay tuned for the next video next Friday

For more infomation >> How to Make Your Wedding Unique - Duration: 2:25.

-------------------------------------------

How to Deal With Stress - Inspirational Video - Duration: 1:34.

Dr. Abraham Twerski: "There's something I want to tell you about the stress and how we have to look

at stress okay and I think it's an important thing because many people have

told me from my lectures the one thing they remember okay now I was sending a

dentist office and looked at an article would said how do lobsters grow well I

don't care how lobsters girl look I was interested it and it points out that a

lobsters are soft mushy animal that lives inside of the rigid shell that

rigid shell does not expand well how can a lobster grow well as the lobster grows

that shell becomes very confining and the kind of the lobster feels itself

under pressure and uncomfortable it goes under a rock formation to protect

yourself from predatory fish cast off the shell and produces a new one

well eventually that show becomes very uncomfortable as it grows the right back

under the rocks and the lobster repeats this numerous times this stimulus for

the lobster to be able to grow is that it feels uncomfortable right now

if lobsters had doctors they would never grow because as soon as the lobster

feels uncomfortable goes to the doctor gets a valium gets a percocet feels fine

never kept off his shell so I think that we have to realize is that we have to

realize that times of stress are also times within our signals for growth and

if we use adversity properly we can grow through adversity

For more infomation >> How to Deal With Stress - Inspirational Video - Duration: 1:34.

-------------------------------------------

Amazing Chocolate Cake Style 2017 | How to Make Chocolate Cake Season 8 | Chocolate Satisfying Cake - Duration: 10:50.

Thank You For Watching Channel Recipes Food Cake Dessert!

Thank You For Watching! Please LIKE - COMMENT - SUBSCRIBE to Channel Recipes Food Cake Dessert!

Please LIKE - COMMENT - SUBSCRIBE to Channel Recipes Food Cake Dessert to see more interesting new Videos!

For more infomation >> Amazing Chocolate Cake Style 2017 | How to Make Chocolate Cake Season 8 | Chocolate Satisfying Cake - Duration: 10:50.

-------------------------------------------

1 Simple Method to Improve Your Spelling - How to Write Correctly & Avoid Spelling Mistakes - Duration: 4:33.

Do you make lots of spelling mistakes?

Do you have difficulty remembering the correct spellings of words?

Well, in this lesson, I'm going to teach you an easy, three-step method to improve

your spelling and write correctly without making mistakes.

So let's talk about that.

OK, the first step of this exercise is to find your spelling mistakes.

You do this by checking your own writing.

If you are a student, then I'm sure you write a lot.

If you work, you might write emails or reports.

So, at least once per week, take your writing, and try to find spelling mistakes that you

have made.

Now, I know that this can be difficult – you don't know what mistakes you're making.

So there are two great ways to know your mistakes – the first is to ask someone else to read

your work and underline or circle any errors (and also give you the correct spellings).

The second option is to take your writing and type it (or copy/paste it) into Microsoft

Word.

The software will then underline your spelling mistakes for you and give you the corrections.

This way, you can identify your own errors.

OK, let's do an exercise to understand this process: Here's a short text that I wrote

– there are five spelling errors in it.

Stop the video, try to find the mistakes, then play the video again and check.

OK, here are the answers: 'a lot' should be spelled with a space.

'Definitely' has no 'a' – it should be an 'i'.

'Received' is written with 'ei' not 'ie'.

'Rhythm' needs to have an 'h' after 'r'.

And 'schedule' needs to start with 'sch'.

OK, did you find them all?

Alright, so like this, you identify the words that you are spelling incorrectly and learn

their correct spellings.

And now comes the important part – record the correct spellings of these words.

That means, you should note down the correct spellings of all the words you spelled wrongly

in a notebook or in a file on your computer.

You should write the spellings on one side of the page, and on the other, you should

write the phonetic transcription – that is, the same word in pronunciation symbols

– this will allow you to see the difference between the spelling and the pronunciation,

and you will also be able to test yourself later.

Now, I know that you don't know all of these symbols, that's OK – they're very easy,

you can find them by looking up each word in a dictionary.

So just like I have done here, you should take all of the words – note down the correct

spellings, and also note down the phonetic transcription.

Finally, the last step is review the spellings regularly.

You do this so that you don't forget the correct spellings.

Make one day of the week your spelling improvement day (maybe Saturday or Sunday).

On this day, test yourself on the spellings.

To do this, open your notebook and hide the spellings.

Only look at the pronunciation symbols.

Now, can you give me the correct spellings of these words that we just learned?

Stop the video, try to write down the correct spellings, then play the video again and check.

OK, here they are.

Did you get them all right?

So, you should do this for your own spellings that you write down.

By testing yourself, you will remember the correct spellings and you will not make the

same mistakes again.

You should do these three steps regularly – find your mistakes, record the correct

spellings, and test yourself regularly.

As you do this, you will start to collect more and more words.

This means that your mistakes will reduce, and eventually, you will be able to write

without making spelling errors.

Alright, if you liked this lesson, give it a thumbs up by hitting the like button.

If you're new to my channel, make sure to subscribe by clicking the subscribe button

to get my latest lessons right here on YouTube.

Happy learning and I will see you in another lesson soon.

For more infomation >> 1 Simple Method to Improve Your Spelling - How to Write Correctly & Avoid Spelling Mistakes - Duration: 4:33.

-------------------------------------------

STM32 Arduino Tutorial - How to use the STM32F103C8T6 board with the Arduino IDE - Duration: 7:02.

Dear friends welcome to another video!

Today we are going to take a first look at the STM32 Arduino Compatible Board.

This board is powerful and inexpensive.

Let's see what it has to offer!

Hello, guys, I am Nick and welcome to educ8s.tv a channel that is all about DIY electronics

projects with Arduino, Raspberry Pi, ESP8266 and other popular boards.

You can subscribe to our channel by clicking on this button.

Today I am very excited because we are going to test this new board which uses the STM32

chip and we are going to learn how to program it using the Arduino IDE.

As you can see, I have connected one of my favorite displays; the 1.8" Color TFT display

and I have loaded the graphics test program.

From this test, you can tell that the board is fast!

Let's now take a closer look at the board!

I discovered this little board some time ago when cmb80amiga, a long time viewer of the

channel suggested that I should give it a try.

After watching some of his impressive projects with this board on his YouTube channel, I

decided to buy one to try it.

You can visit his channel by clicking on this card.

The board costs around 3$, you can find a link to it in the description below.

The board I bought, which is also called the blue pill because of the blue color of the

PCB, features the STM32F103C8T6 chip, which is powerful, ARM processor!

The board is tiny.

It is slightly bigger than the Arduino Nano board.

Apart from the chip itself, on the board, we can find an 8Mhz Crystal and a 32KHz crystal

to drive the internal Real Time Clock.

The board uses 3.3V logic levels, but most of its pins are 5V tolerant.

Let's now take a closer look at the heart of the board the STM32 chip.

The chip is a 32bit ARM processor which is clocked at 72MHz!

The chip does not offer WiFi or Bluetooth, but it offers, 20KB of RAM and 64KB of Flash

memory which is enough to build large projects.

It also provides 37GPIO pins, 10 ADC pins, SPI, I2C, CAN, UART buses and a DMA controller.

These are impressive specs for a chip that costs 3$.

If we compare the specs of the STM32 with the specs of the Arduino Uno, we can see that

this small board outperforms the Arduino Uno in every field.

The frequency at which the STM32 chip operates is 4.5 times higher than the frequency that

the Arduino Uno operates.

So, we expect the STM32 to be at least 4.5 times faster than the Arduino Uno.

To find out if this is the case, I created a simple benchmark.

Both boards must calculate the Pi with the same algorithm for the same number of iterations

of the Algorithm.

I have connected a 1.8" Color TFT display to show the results.

As you can see the STM32 board needed 3.8 seconds to perform this task.

The Arduino Uno, on the other hand, needed 29,1 seconds.

That means the STM32 is 7.6 times faster than the Arduino Uno in this example.

The performance difference is huge!

You can download the code of this simple benchmark from a link in the description of the video.

Let's now see how to upload programs to the board with the Arduino IDE.

First of all, to upload a program to the board, we need a USB to Serial module like this one

which uses the FTDI chip.

We connect Vcc from the module to the 5V pin of the board.

Next, we connect GND to GND.

Now we need to connect the RX pin of the module to pin A9 of the board and the TX pin of the

module to pin A10 of the board.

The last step we have to do is to place this jumper to position one, so the module to enter

the program mode.

We press the RESET button once, and we are ready.

Let's go to the computer now.

In order to use the board with the Arduino IDE, we need to install some packages.

Go to File -> Preferences and enter this URL here and press OK.

Now go to Tools -> Board and open the boards Manager.

Search for STM32F1 and install the package that appears!

The installation procedure will take a few seconds.

After that, all you have to do is to select your board.

Under the Tools Menu again, we choose the Generic STM32F103C board, for the Upload method

we select serial, and lastly, we choose the port that the STM32 board is connected to.

Now we are ready to upload our first program to it!

We open the standard blink sketch.

All we have to do is modify this sketch like this.

The LED on STM32 board is connected to pin PC13 so after this small change we press upload!

A few seconds later the LED starts blinking!

We can reprogram the board if we wish, by pressing the RESET button once more.

When we are finished, we set the jumper back to position 0.

Now we can remove the FTDI module and power the board from the USB input.

The board will start executing the code we just uploaded.

If you power the board and the program is not running, be sure that you have remembered

to switch the jumper back to its original position.

The current that the board draws when running the blink sketch is around 40mA but it can

be reduced if you put the processor to sleep, something I haven't tried yet.

If any of you has more information about it, please share it in the comments below.

Now that we know how to use this board, we have another great tool in our toolset.

The STM32 board is an extremely powerful board and useful board even though it does not offer

WiFi or Bluetooth.

It can replace the Arduino Nano on many projects that we need more program memory or better

refresh rates on big displays.

Since there is a very active community around this board, we can find libraries for most

of the displays and the sensors we are using.

So if you need a small but powerful board with many IO capabilities, the STM32 board

will probably fit your needs.

I would love to hear your opinion on this board and your experience with it.

Are you going to build any projects around this board?

Please, post your comments in the comments section below!

If this is your first time here, I would love to have you subscribed.

In this channel, I post videos about DIY projects twice a month.

I love making things, and I believe that anyone can make things, anyone can become a maker.

That's why I created this channel, to share my knowledge with the community and learn

from the community.

I hope you will join us.

I will see you in the next video!

[ Translating these subtitles? Add your name here! ]

For more infomation >> STM32 Arduino Tutorial - How to use the STM32F103C8T6 board with the Arduino IDE - Duration: 7:02.

-------------------------------------------

How to Do a Magic Trick with Video Editing Software | 2017 - Duration: 2:59.

So how did it happen? let's find out after this intro

So first what you have to do is that you have to record the video in two different situations

You have to record the video with an object

and then you have to record the video without an object after that

what you are going to do is that you are going to combine these videos together in video editing software

So here I have already recorded the video. I'm going to import the video from my computer, so I'm going to click "Import"

As you can see that I have got two different video files one with an object and another one without an object

so I'm going to import them all and

Then I will drag each one of them down to the timeline for further editing

Now these raw video footages are very long in size

So what I'm going to do is that I'm going to cut them short and keep only necessary portions, which will serve my purpose

So again, I'm going to emphasize one thing is that on the timeline

There is going to be only two video footages one with an object

another without an object and

When you are placing two video footages together side by side

It will give you an impression that the object has just disappeared when you are actually playing the video

So let's play the video to see what happens to the object whether it disappears or not

it is supposed to disappear from the table, and yes it did and

Now, we are heading to adding some transition effect, but before that I'm going to cut it even shorter

Because it looks very lengthy

So now I'm heading to add

transition effect so click on transition

and

there

You will yeah, I'm going to choose this one

So click on it

and

It's almost ready, you will see how, It disappears from the table so nicely

So that's it if you liked this video subscribe to my channel like and share this video to your friends. Thank you!

Không có nhận xét nào:

Đăng nhận xét